wood

What is pyrography and how to get started

The word "pyrography" comes from the Greek words "pyro," meaning fire, and "graphos," meaning writing.

how-to-wood-burn

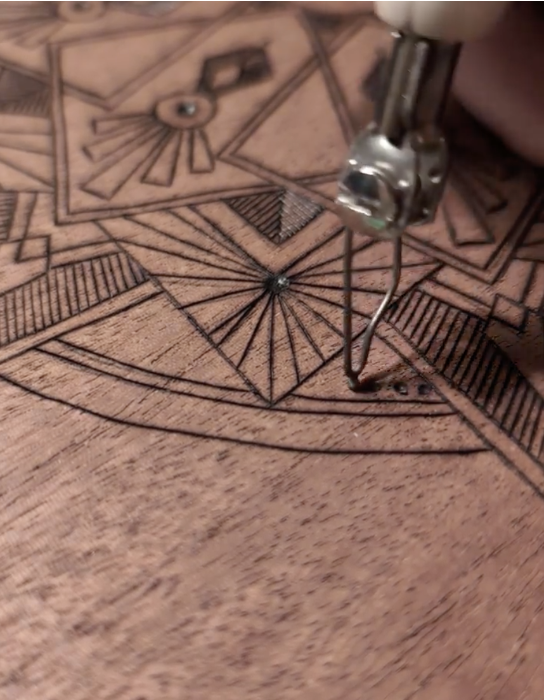
Pyrography, also known as wood burning, is a form of art that uses a hot tool (similar to a soldering iron) to burn designs into wood by using heat to burn the surface.

this technique has been used for centuries by artists all over the world, and it continues to be a popular form of artistic expression today.

One of the advantages of pyrography is that it is a relatively inexpensive art form. A basic pyrography pen can be purchased for a reasonable price, and wood is readily available in many stores. This makes it accessible to anyone who wants to try their hand at this art form.

keep reading to learn how to start the art of pyrography.


safety first:

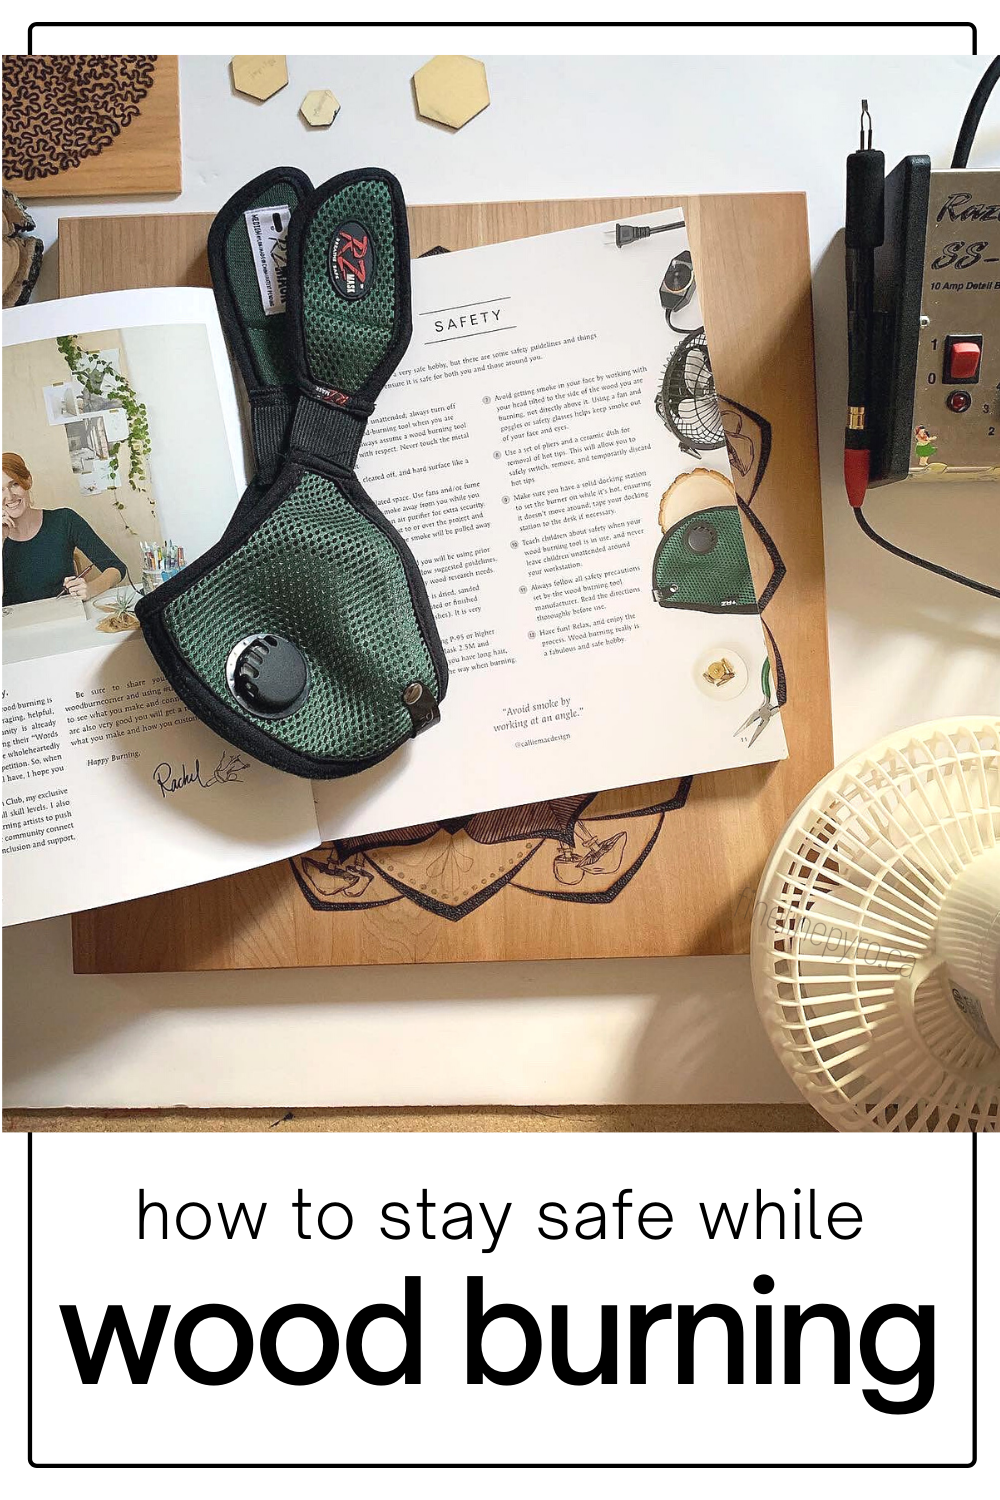
Please take a moment and make sure to review the safety guidelines provided by the manufacturer of the tool you are using and wear your safety gear when burning!! check out this blog post for extra tips on how to keep yourself safe while you burn: how to wood burn safety

A quick start guide to pyrography

Step one:

pyrography-nibs

in order to get started, all you essentially need is a tool and a surface to burn on.

If you need help knowing which tools is right for you, check out my community website with a rundown on how to choose a wood burning tool.

Everyone likes different nibs for different reasons. I found that general the favourite was the ball point nib or a writing nib (these have round tips so they tend to write like an actual pen and don’t get stuck to the wood). If you don’t have the budget to try a variety, start with this one.

I also created a list of best woods to burn on for all skill levels.

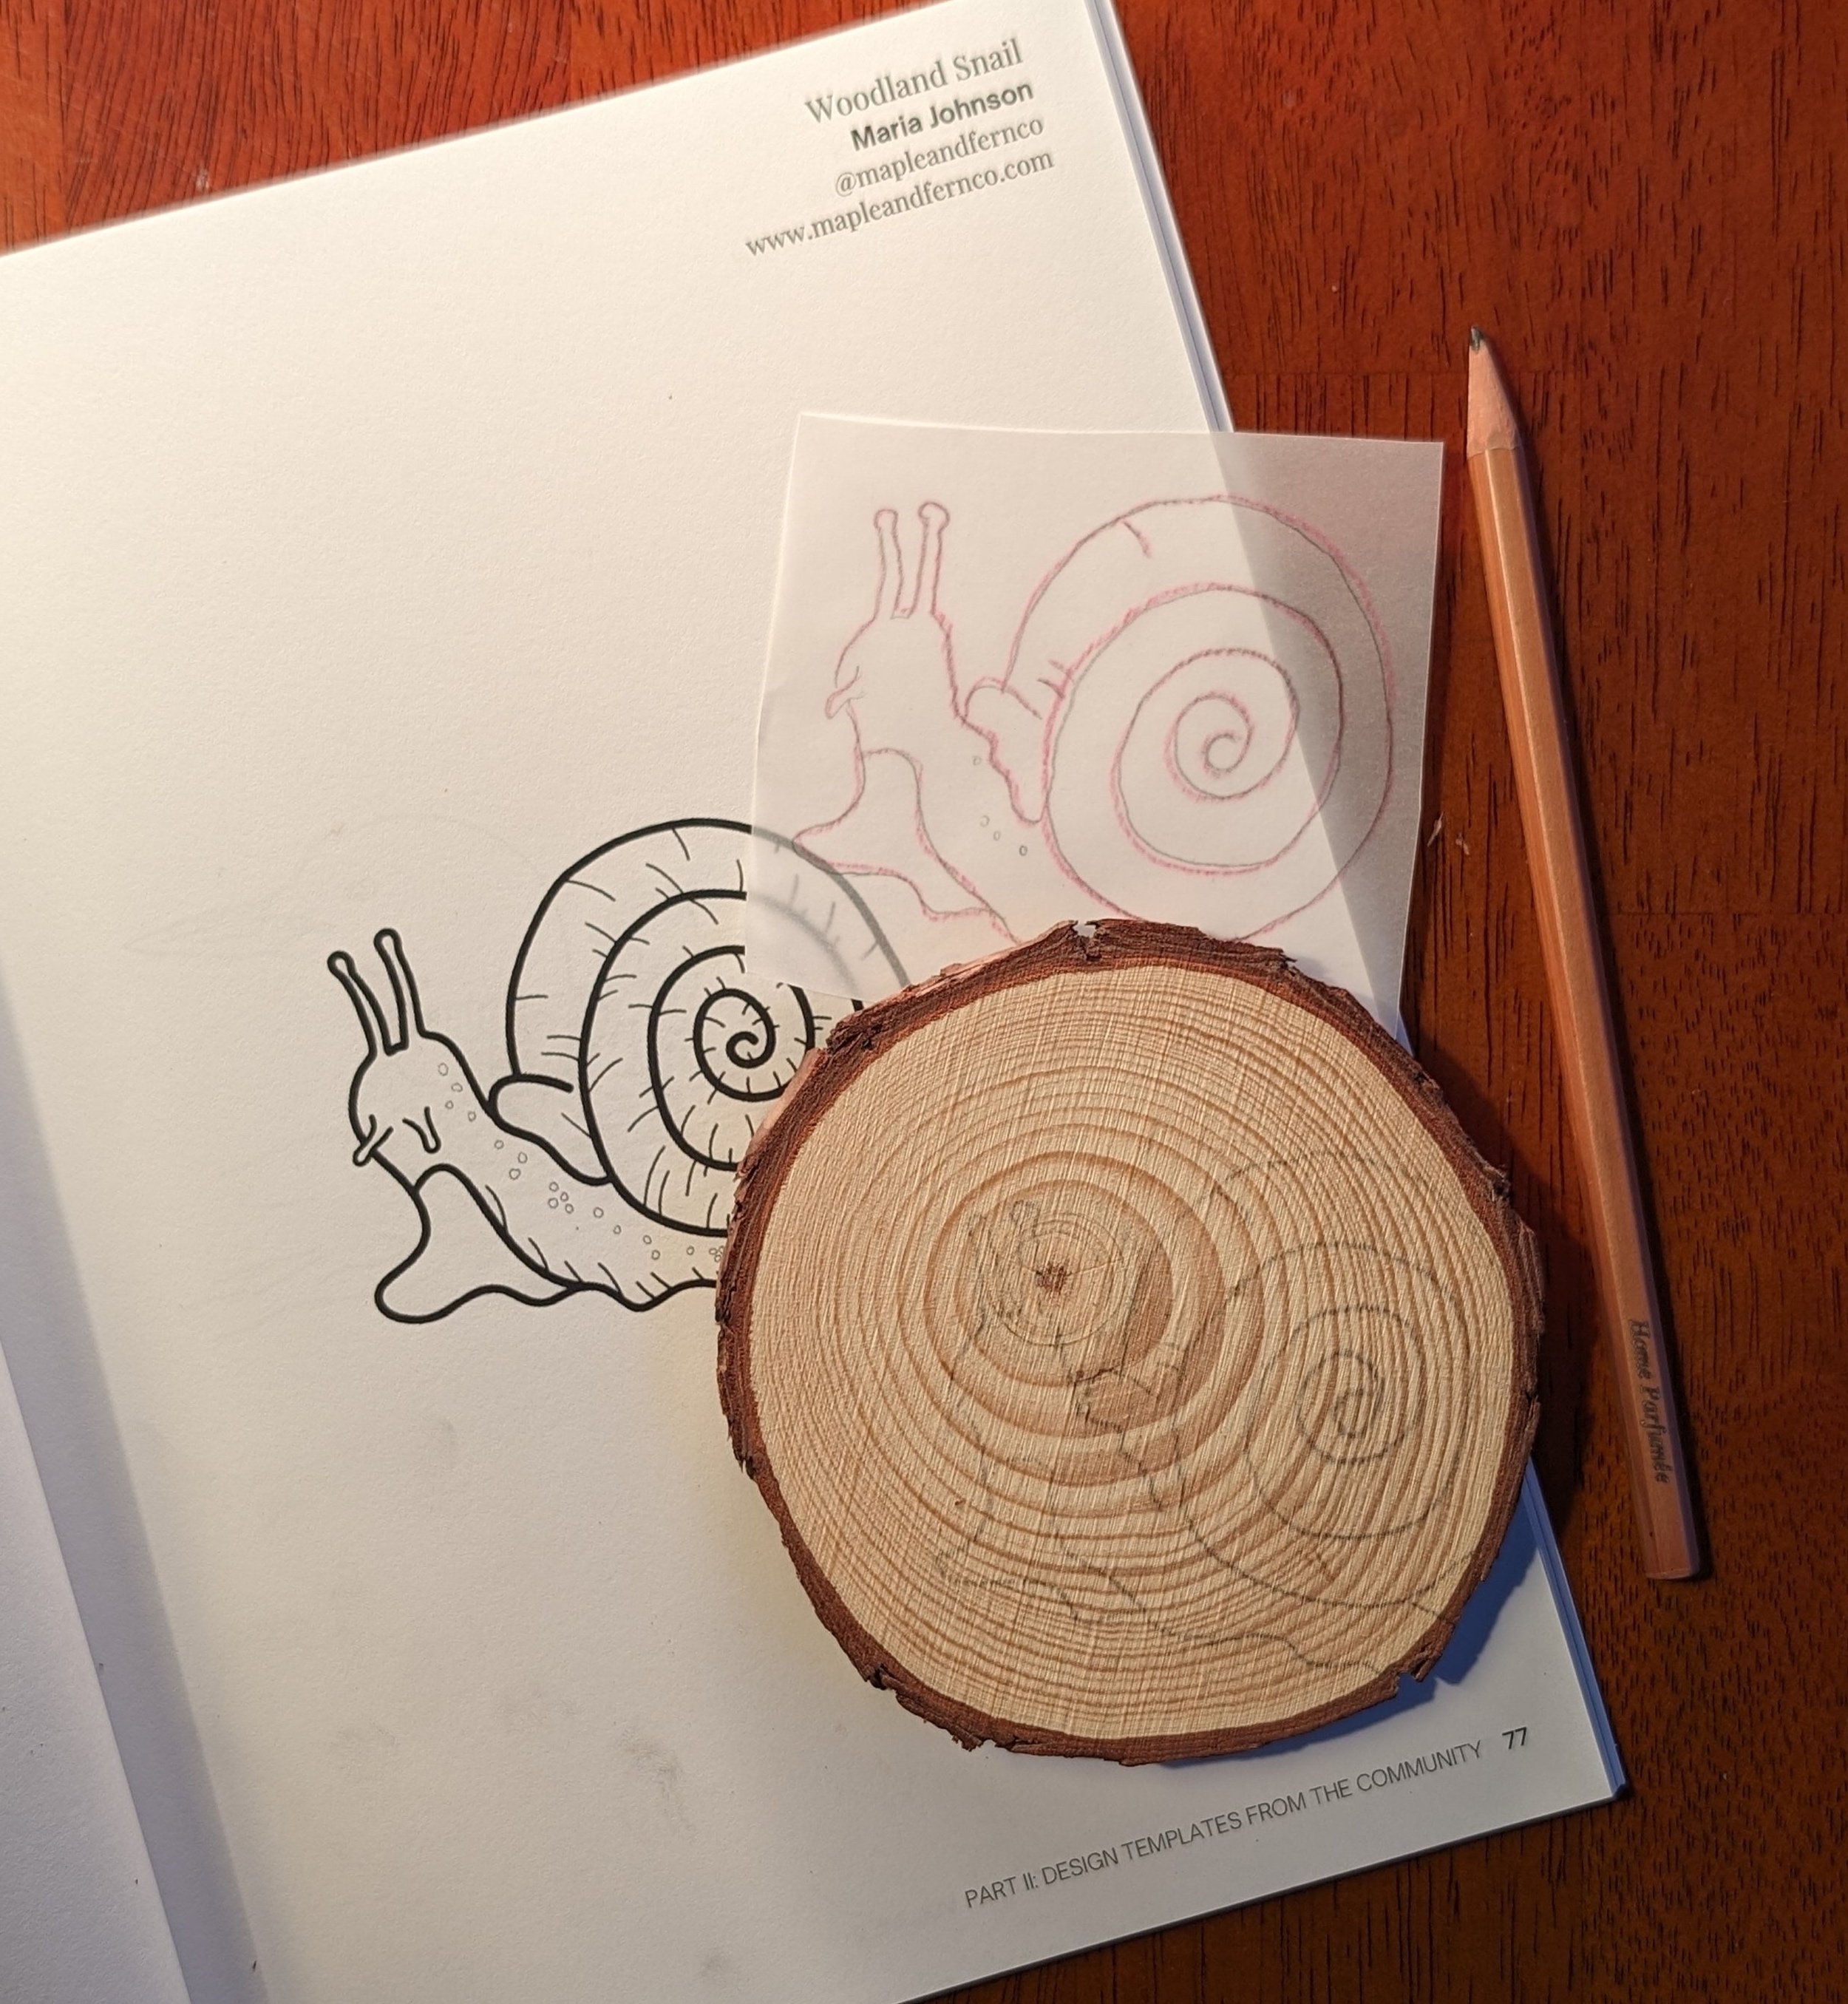
Oh and you will also need an idea of WHAT you want to burn! You can dive into burning freehand, you can draw your design on the wood slice with a pencil and burn over your lines with the hot tool or you can transfer a design onto your wood slice.

DESIGNS AND TEMPLATES:

If you want a design to practice with, check out my freebies page, grab a one of my Community Template Books or visit the templates store full of individual patterns for sale.

how-to-transfer-a-design-to-wood


step two:

transferring your design/template onto wood:

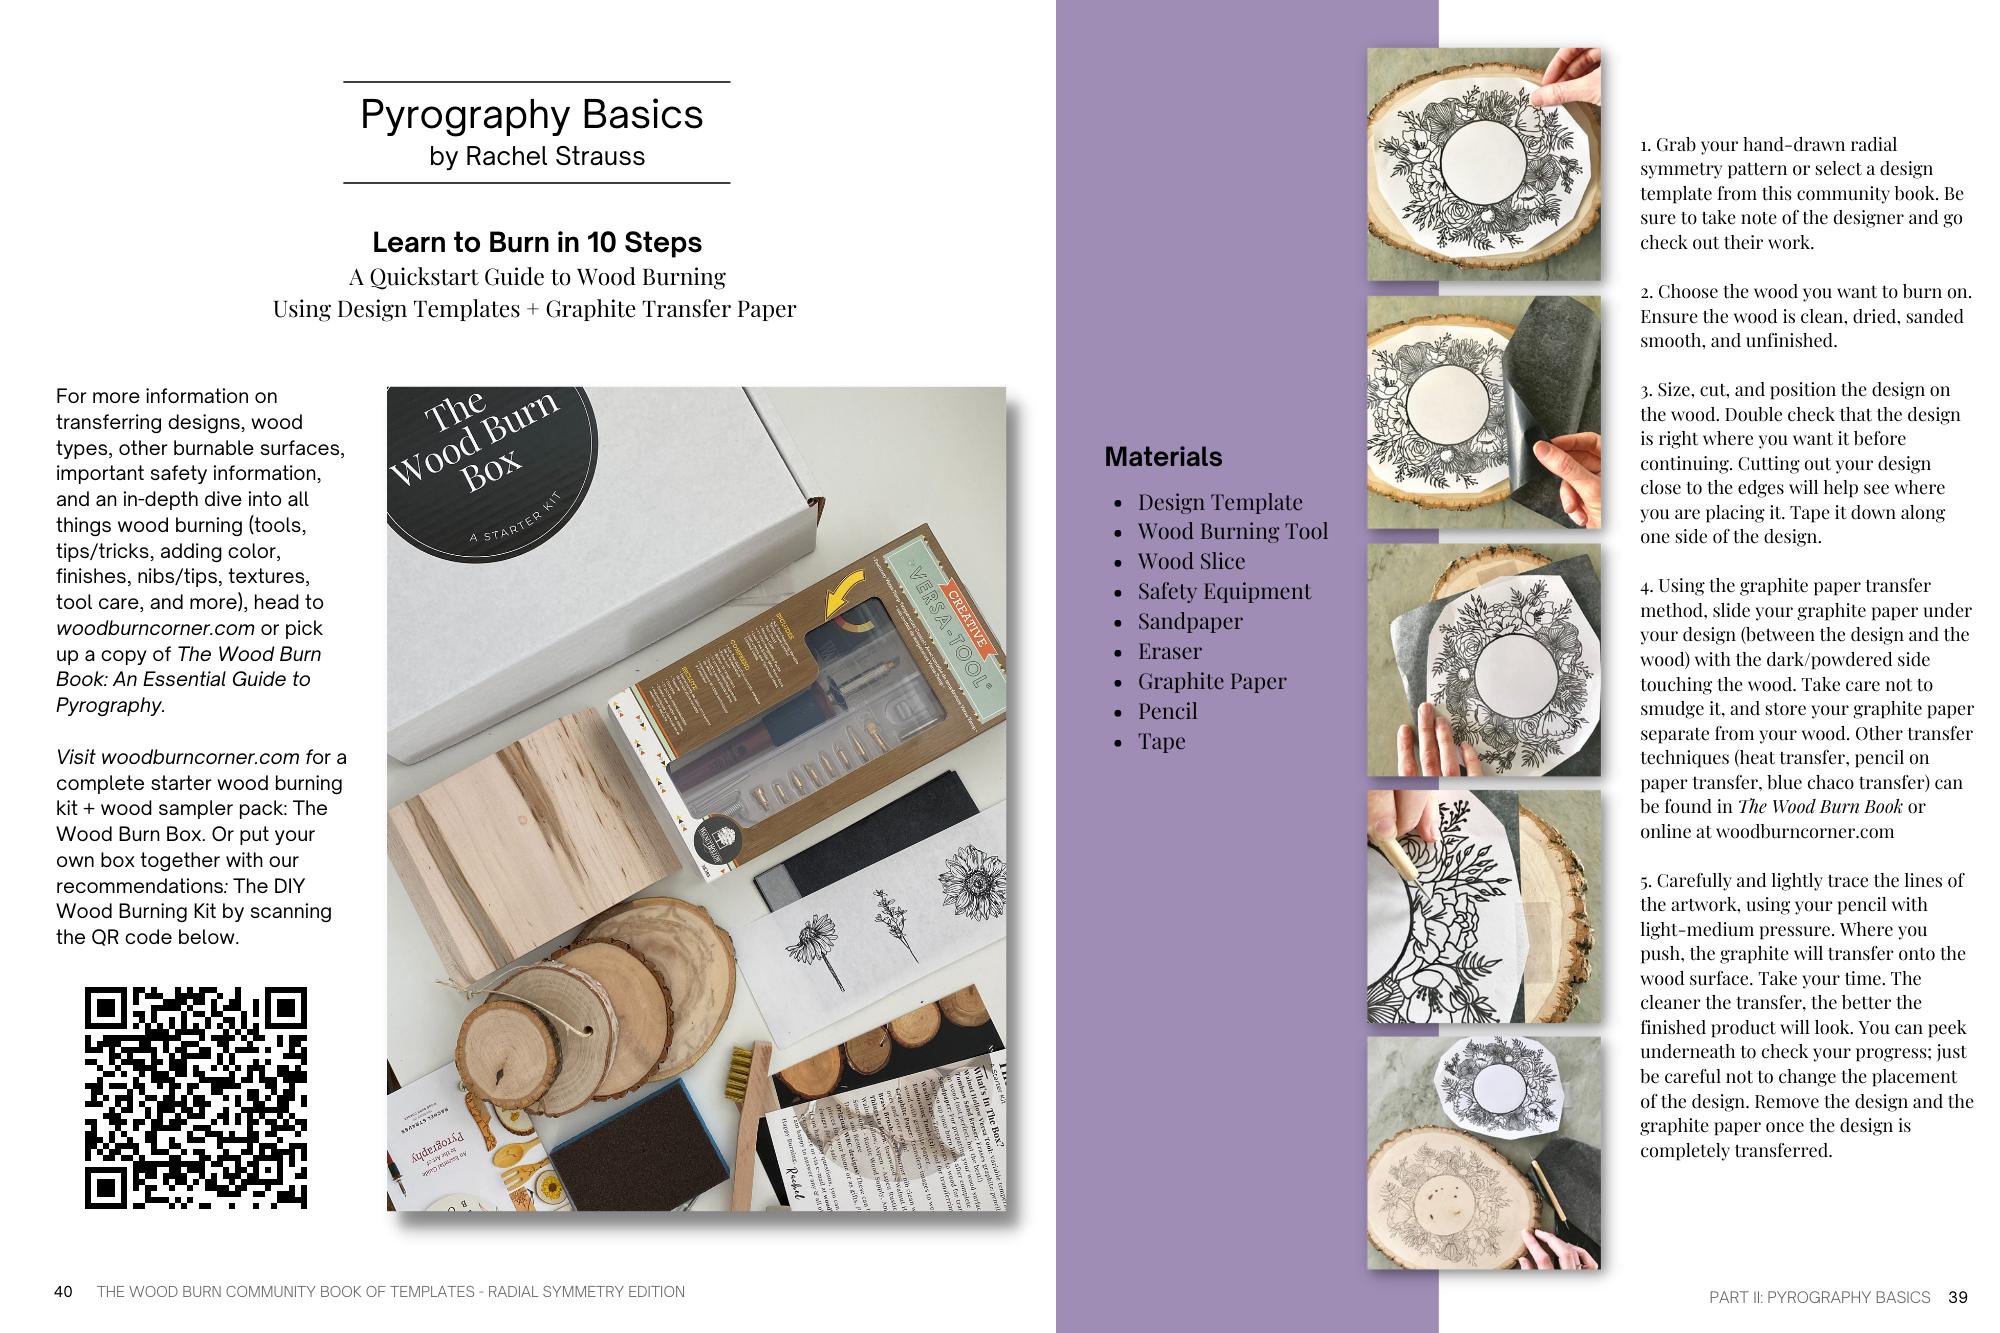
if you are not drawing directly on your wood slice and you are not freehand burning, transferring a template is your next choice. You can learn how to transfer your design here: how to transfer a design onto wood: top three ways

step three:

heat up your tool by plugging it in and turning it on. some burners heat up super quickly and some take a little longer, so test out your pen on a scrap wood before you begin.

make sure to wear your safety gear and follow the safety guidelines.

step four:

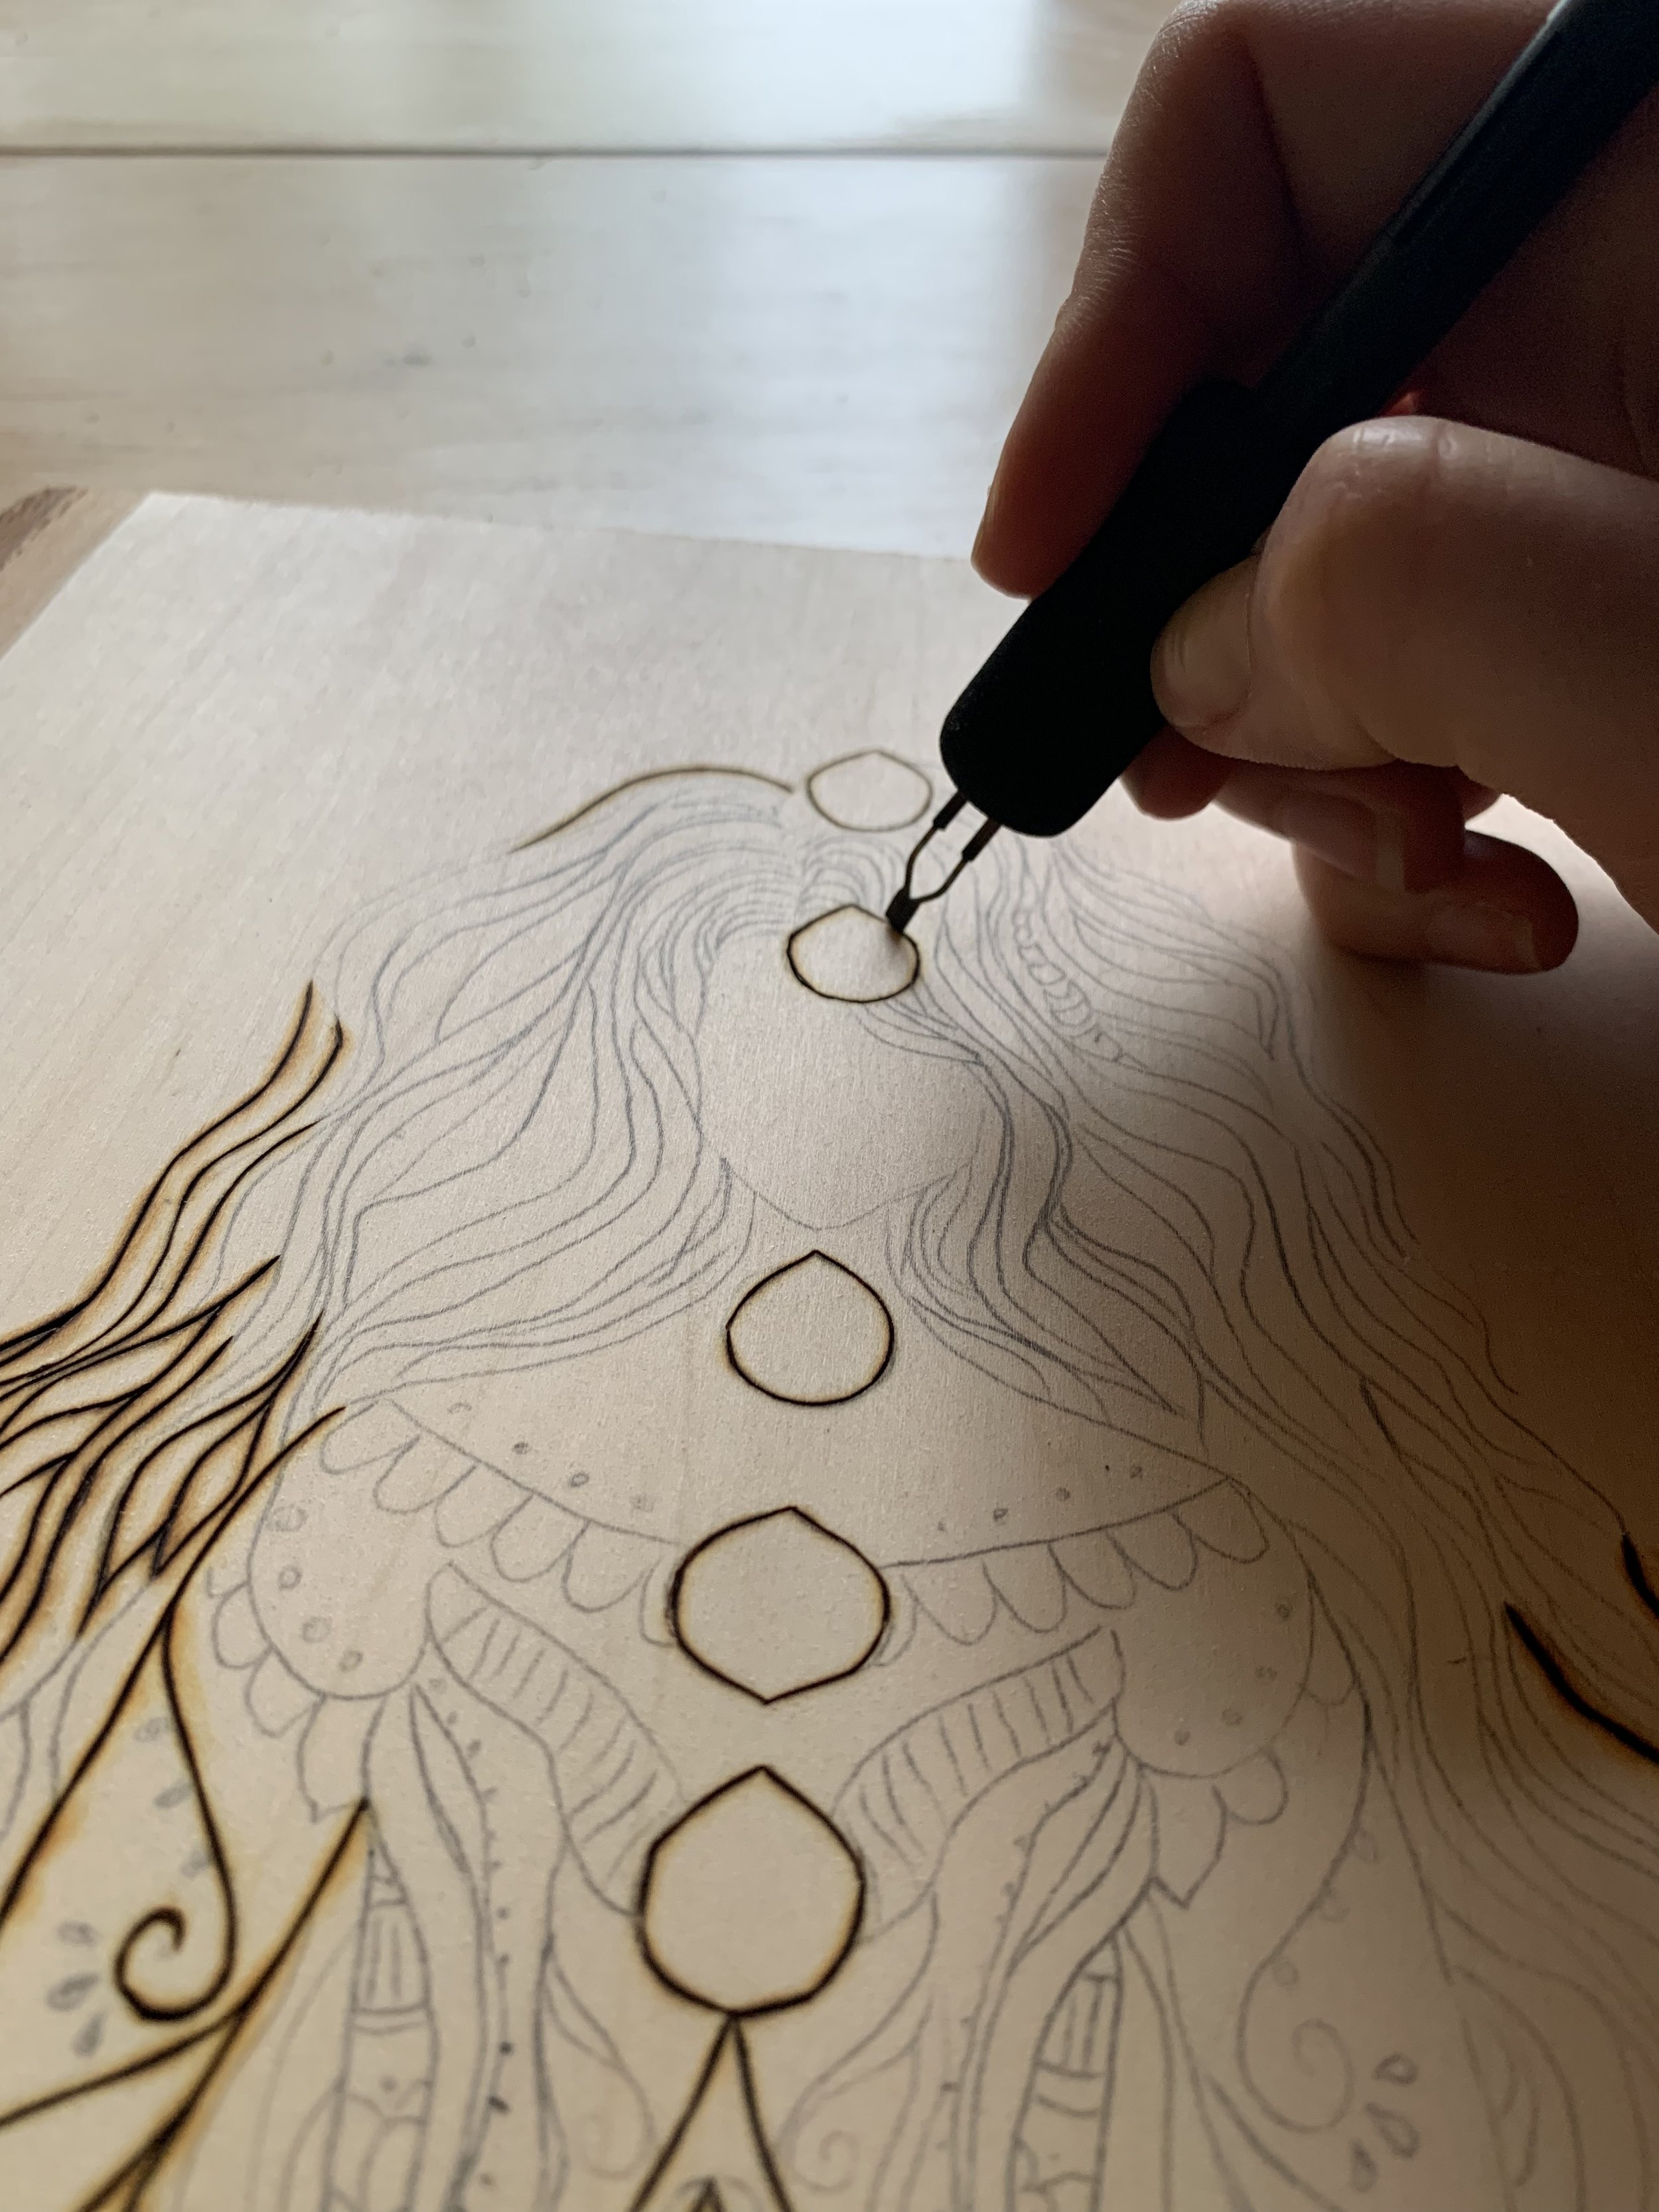
once you’re ready to burn, start at a low/medium heat point if you have the option. here are some tips to remember when burning:

how-to-woodburn
  • go slow: seriously, go much slower than you think.

  • stay consistent: keep your speed consistent. staying in one place will cause a blob burn and moving too quickly will give you thin inconsistent lines.

  • don’t press hard: not a lot of pressure is needed so make sure to let the heat do the work for you.

  • play around with the heat: try different heat settings and see which one resonates with you. some people like to burn fast and hot, some prefer slower and lower… p.s. fast and hot is still a slow process but in detailed areas, you will need to be super extra fast if burning hot so when in doubt, start low and build up the heat to where you like it.

  • play around with different nibs: if you have the option, switch your nibs around and try all of them.

  • pushing versus pulling your pen: try both ways. after time, I am able to move the tool in all directions, but when starting out, pulling is generally easier because you’re not fighting with the wood by pushing, rather, you are dragging it along the surface by pulling.


step 5:

Once wood burning is complete, use a sand eraser to remove any pencil marks or graphite lines still showing. Check out: How to get rid of mistakes and graphite/pencil lines.

you can choose to finish your piece or leave it raw, but otherwise you are finished! woohoo!

One of the advantages of pyrography is that it is a relatively inexpensive art form. A basic pyrography pen can be purchased for a reasonable price, and wood is readily available in many stores. This makes it accessible to anyone who wants to try their hand at this art form.

Pyrography can be used to create a wide range of items, from small decorative pieces like keychains and plaques to larger items like furniture and wall art. It is a versatile art form that allows artists to express their creativity in many different ways. Check out my pinterest board full of ideas of what to burn next.

In addition to creating beautiful artwork, pyrography has some practical applications as well. It can be used to mark and label items, such as tools and equipment, and it is often used by woodworkers to add decorative details to their projects.


THe slowness and satisfaction of burning something really is like a meditative journey for me. I hope you enjoy the art of pyrography as much as I do!
 

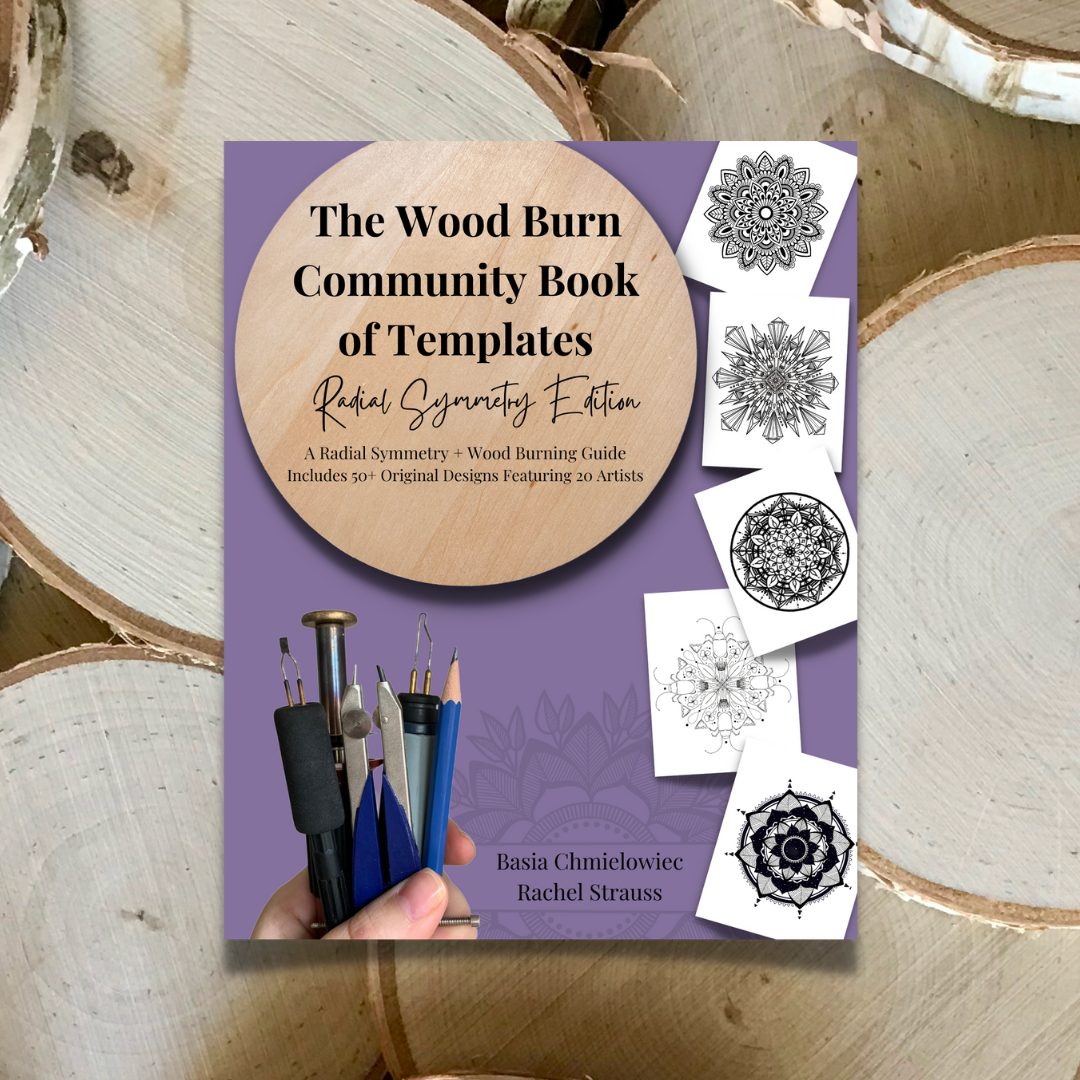
The Wood Burn Community Book of Templates - RADIAL SYMMETRY EDITION

drum roll please…

I cannot believe it but it’s here!! A pyrography and radial symmetry template book that includes instructions on how to draw your own patterns AND burn them!!


pyrography-templates-to-trace
 

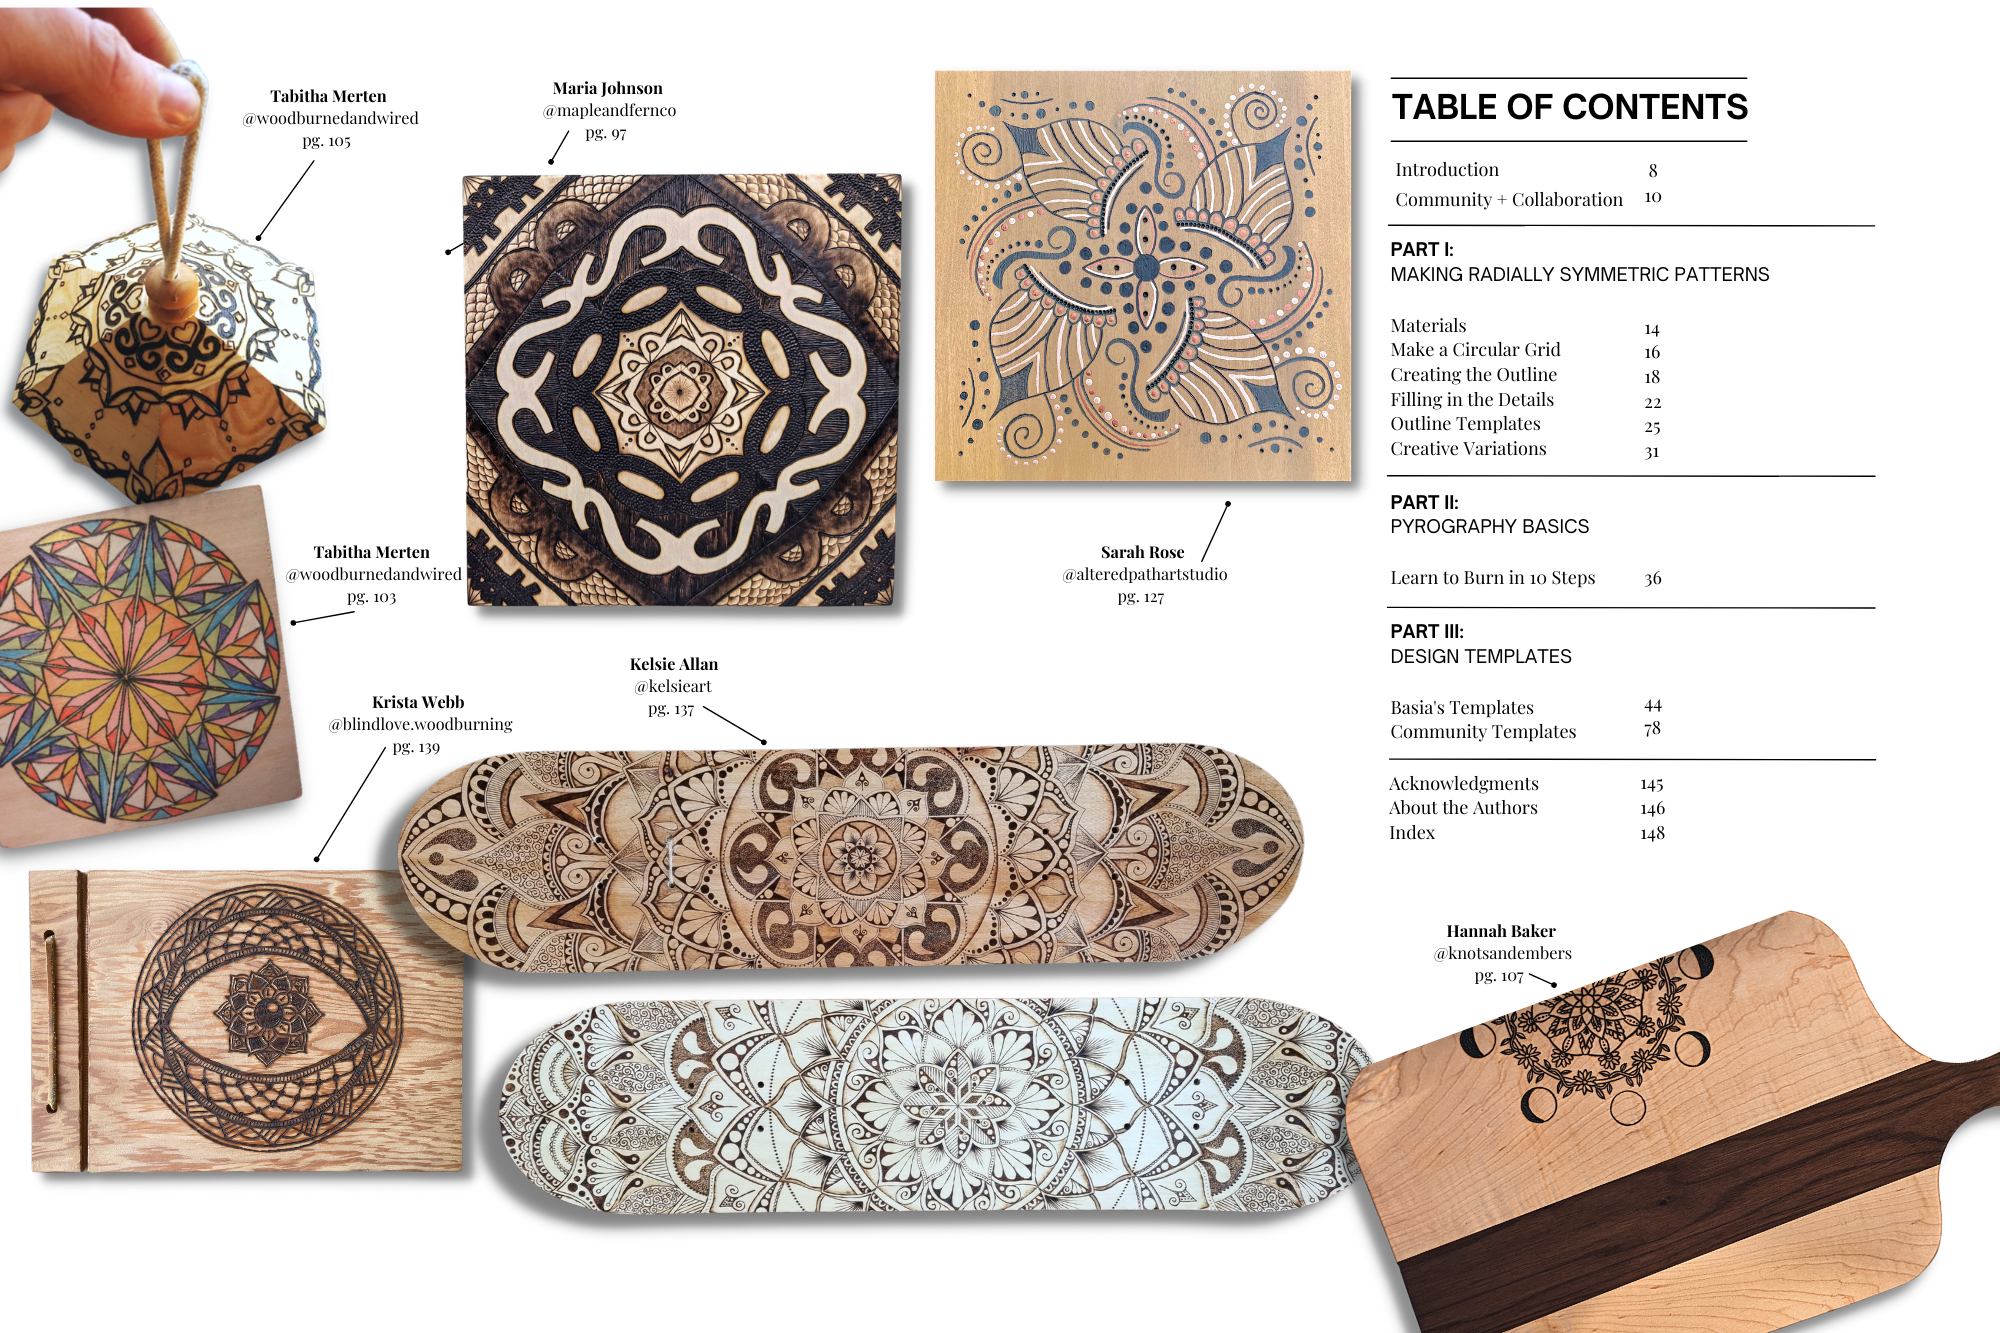
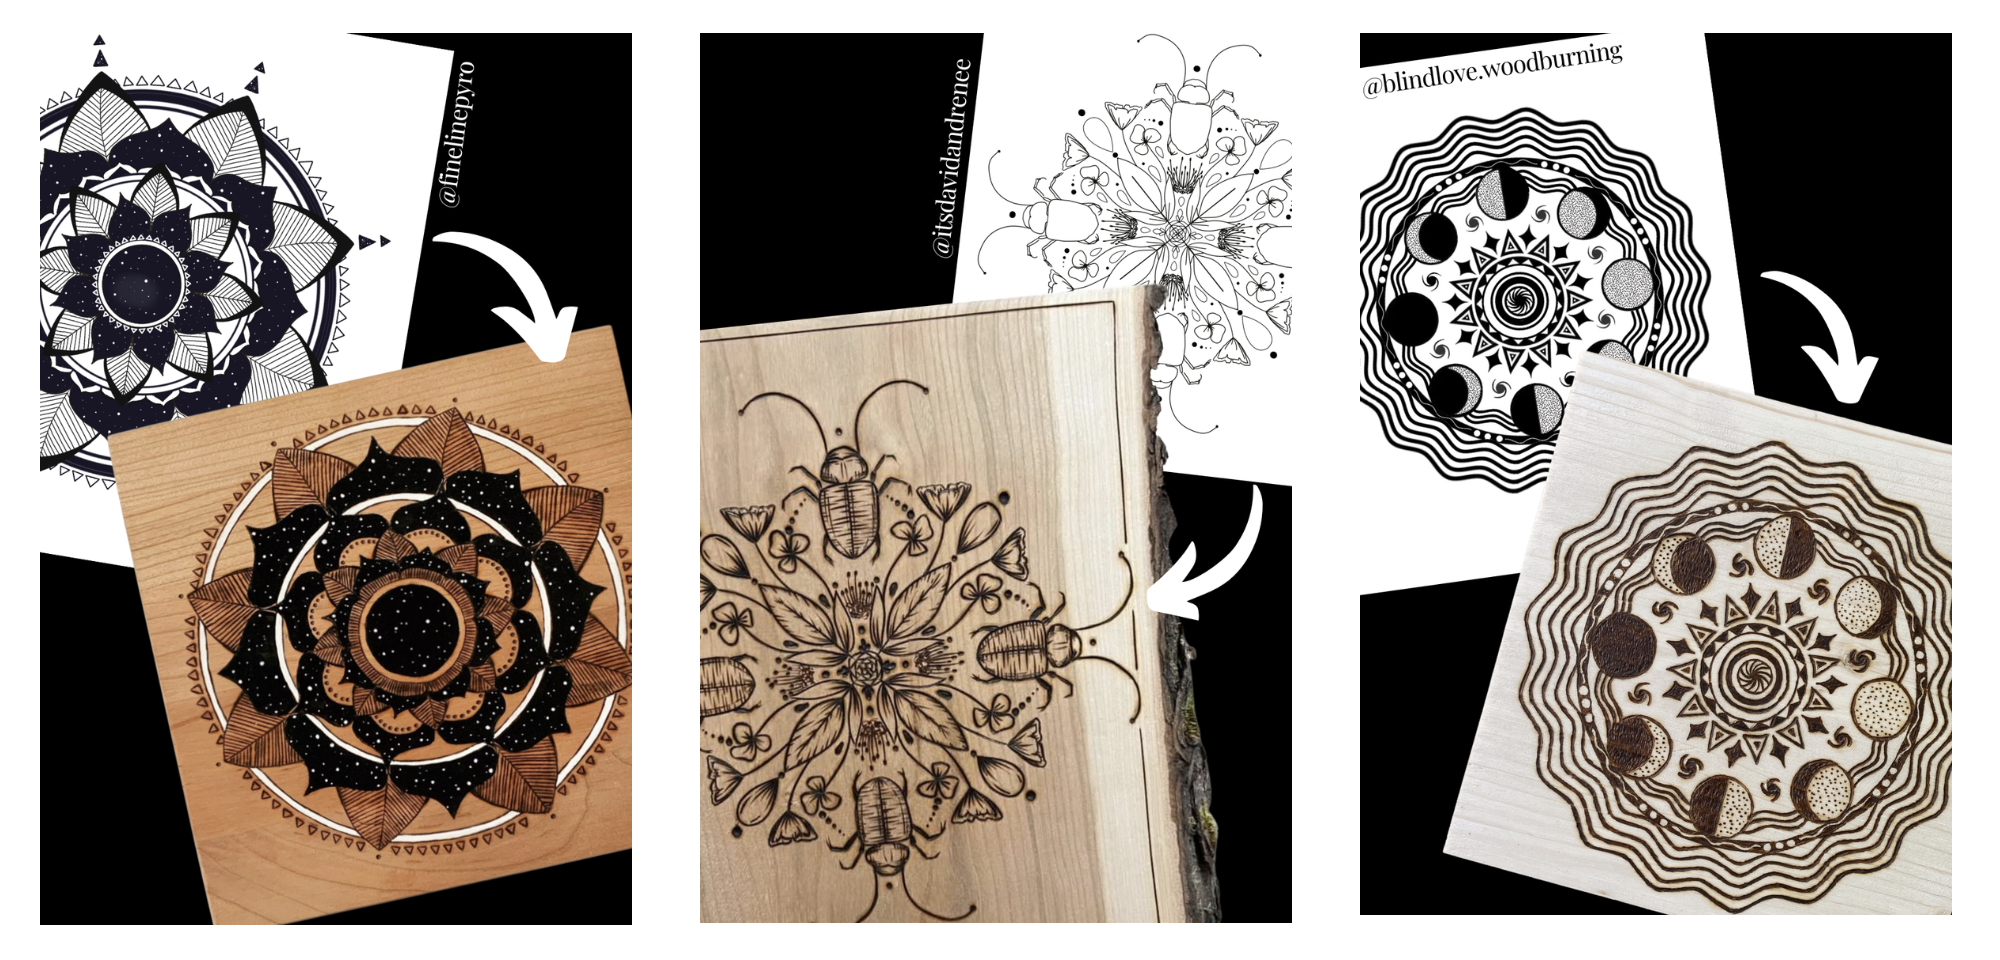
The Wood Burn Community Book of Templates - Radial Symmetry Edition features pyrography design patterns created by the community for the community. It showcases 50+ original templates from 20 wood burning artists from around the globe, with the intention of helping artists of all skill levels past, present, and future to hone their craft, try new styles, and make beautiful art through collaboration. This collection of designs includes a variety of patterns in radial symmetry style.

Check out #thewoodburncommunitybook on instagram to view completed projects from all the template books!


Easily size and print the designs to match the wood you already have by downloading the digital version


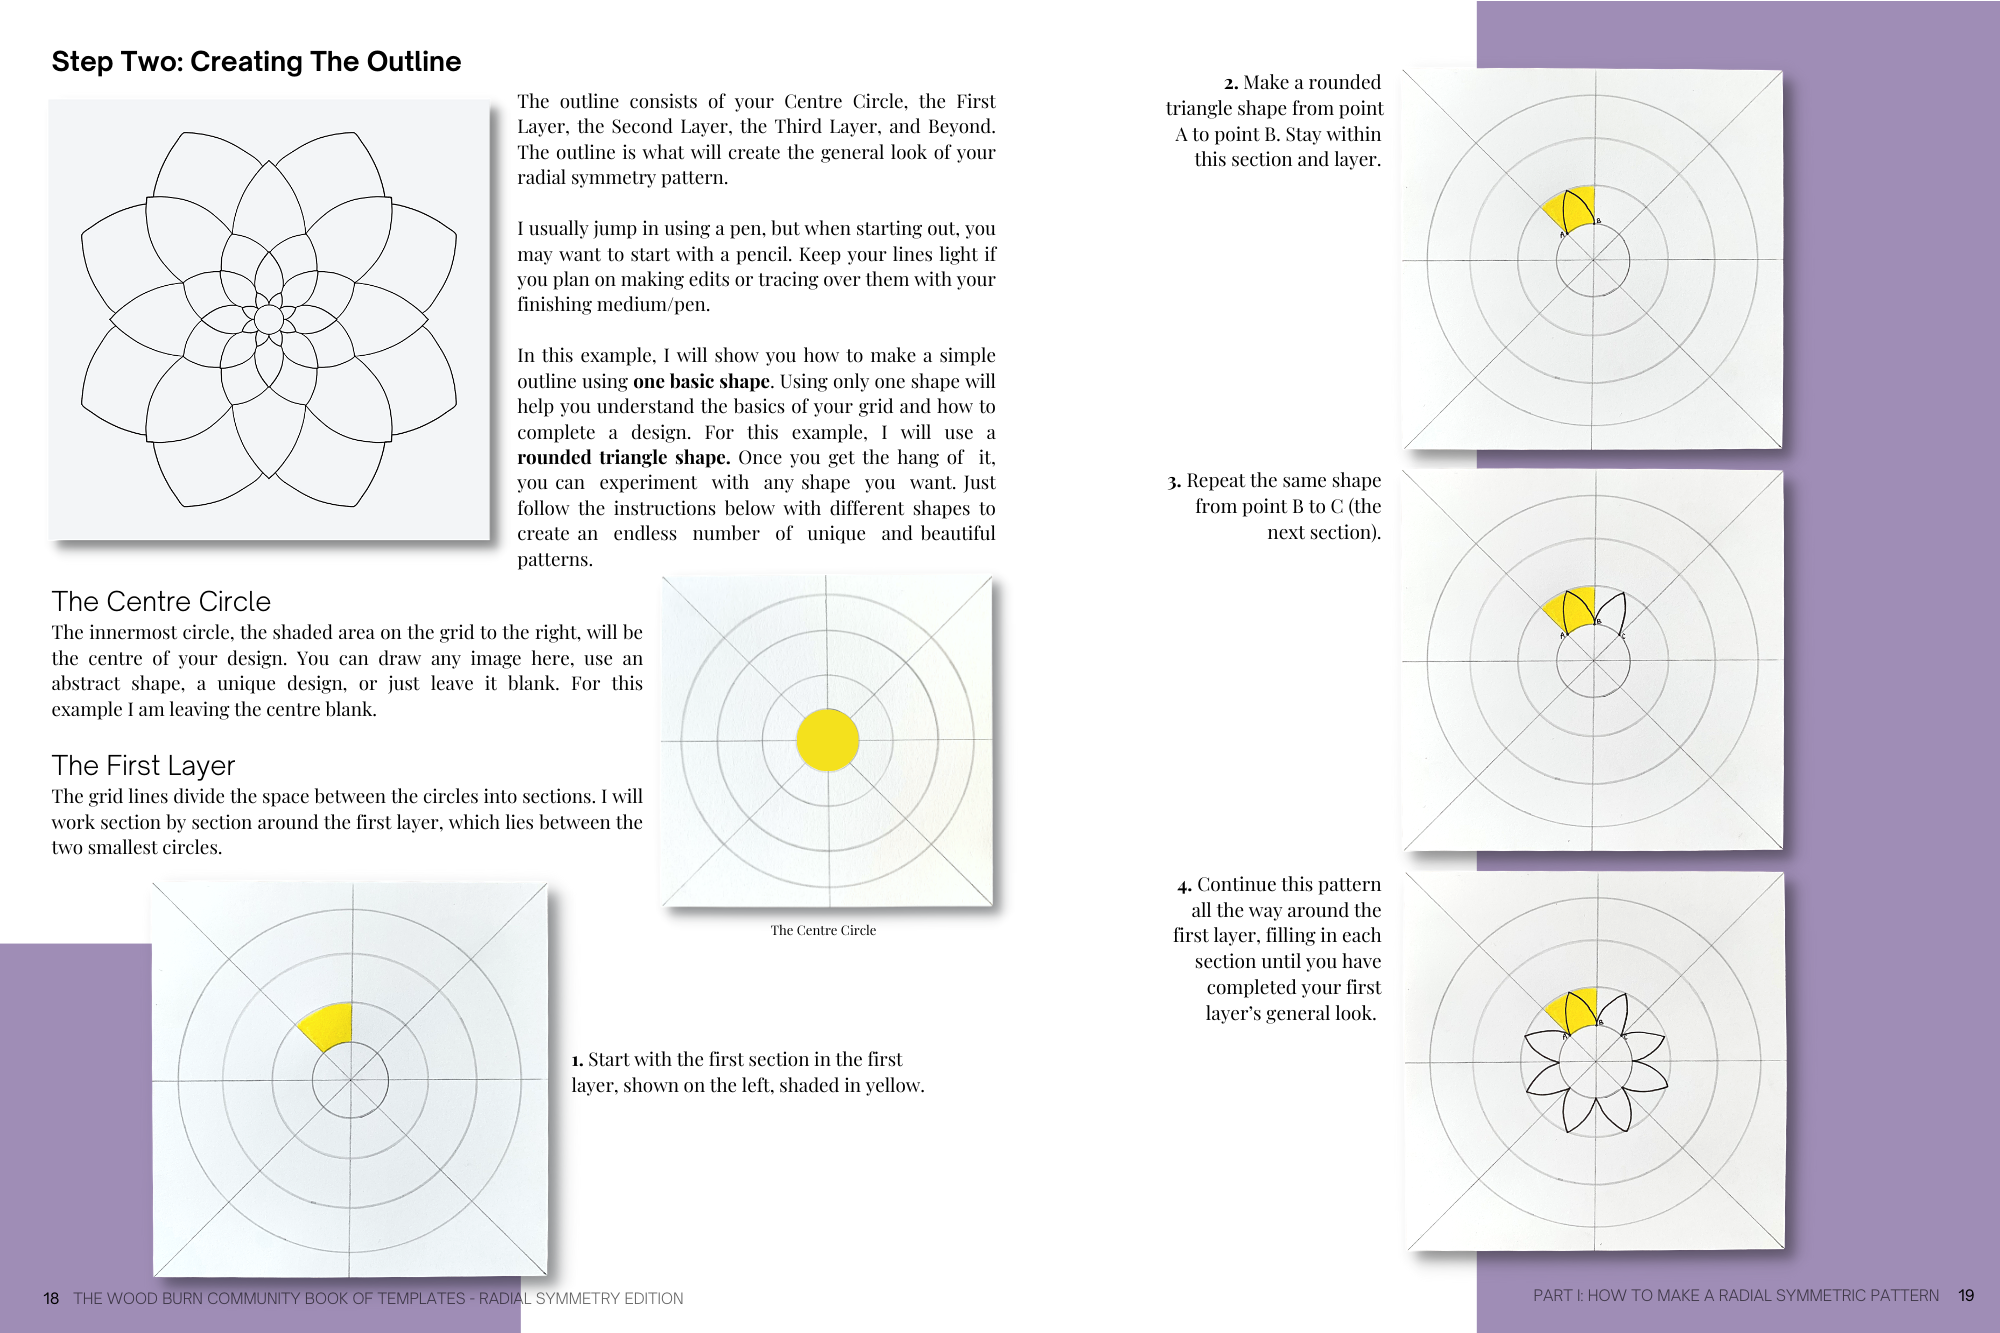
Basia Chmielowiec guides you with step-by-step instructions on how to make your own radial symmetry patterns and includes 7 different creative variations. Her intention is to give you the knowledge and instructions for you to continue making one-of-a-kind radial symmetry patterns.

 
how-to-draw-a-mandala


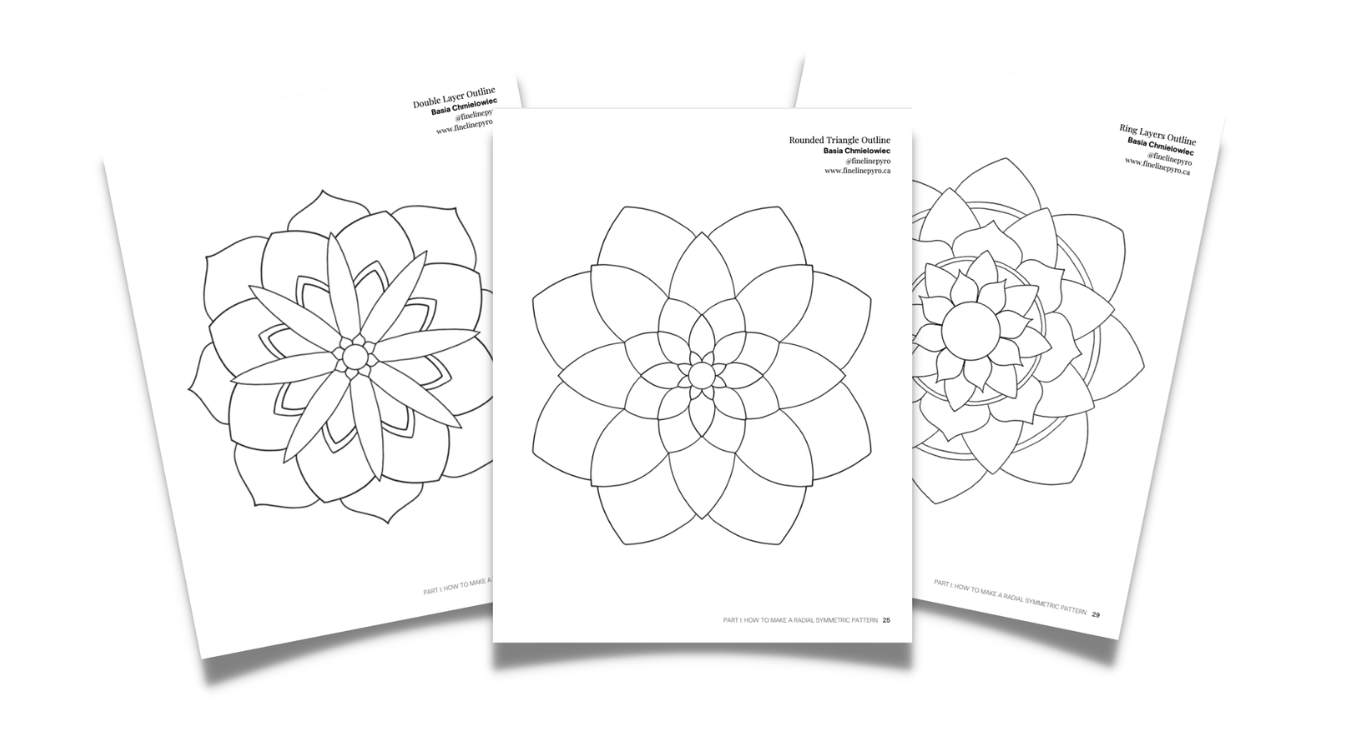
Plus, she includes 3 ready-made outlines for you to practice on or doodle in!


Rachel Strauss, author of The Wood Burn Book and the original Wood Burn Community Book of Templates Volume One and Two, founder of Burn Club, Burn Club+ and Wood Burn Corner, includes a basic wood burning quickstart guide, and provides you with a list of essential materials needed for pyrography. She offers information on getting involved in the community, before presenting you with a feast of artwork, each begging to become your next creation!


check out this flip through:


Check out all the books!

template books, pyro project inspiration books and more!


individual-templates-for-pyrography.png

shop individual templates

check out our collection of templates you can purchase individually on woodburncorner.com


wood burning safety

wood burning can be a safe hobby when you follow the guidelines and safety precautions.

too many times I see artists not using a mask and burning their art without any proper ventilation. although you may not see any side effects from doing this right away, you should be warned that there may be long term effects that can be avoided!!

smoke is smoke. period.

it is not good for you to be breathing the fumes in! or allowing them to go into your eyes and the rest of the house where others are breathing it too.

which-woods-are-toxic?

please, please, please keep yourself and those around you safe by following the safety precautions set by the wood burning tool manufacturer. Below is what I do on top of the manufacturee’s precautions:

below are affiliate links to products I actually use and love! you can also visit my safety section on amazon for more items to stay safe while burning.

here is what I make sure to do for safety:

  • burn in a well ventilated area

  • switch on my winix air purifier that cleans the air in the entire room. it has a carbon filter and a heap filter. seriously, this thing works really well!! my house smells like it has all the windows open!

  • switch on my small air purifier (with carbon filter) that I place near me to suck the smoke directly away from my face. (here is a great smaller portable one). you can also use any regular cheap fan, especially if you are using the large air purifier. turn your fan backwards near your pen/tool in order for the smoke to be sucked away. pointing it at your pen will cool it down and won’t allow you to burn efficiently.

  • always wear a proper mask (rated p95 or higher). my favorite company is rzmask! not only are their masks super comfy, but the have changeable carbon filters so they are better for the environment.

another thing to keep note of is how you position your body and head when you burn. are you one of those people who like to get real close with they face to see what you’re burning? the best case scenario is to tilt the wood slice towards you and have your face further away, not right above the rising smoke.

my community pyrography hub is woodburncorner.com —> grab your free safety guide here for even more tips and tricks to reduce accidents and stay safe while burning.

did you know…

the materials you are burning on emit different toxins depending on what they are made of. some are more toxic than others. so for instance, burning on raw wood can be safe (with the proper gear) but not all raw wood emits the same toxins. there are wood species that are very dangerous for your health, even if you use all the safety precautions and Click here for a list of woods that are ideal for pyrography!

always research your materials to understand what toxic chemicals may be present and whether those chemicals are released when heat is applied.

common wood types you should never burn on:

  • driftwood: burning salt-saturated driftwood is a bad idea as it can release toxic or harmful chemicals when burned, according to the EPA.

  • green wood: this type of wood isn’t a species, it is the state of the wood. meaning it’s not completely dry. once a tree is cut down, it needs to be seasoned for 6 to 9 months to become completely dry. burning on this will create a lot of smoke and will take much longer, the process will be even slower than regular pyrography.

  • wet, rotted, diseased, or moldy wood

  • plywood, particle board, chipboard, wood pallets or any wood with glue on or in it: do not burn on anything man-made. this includes wood that has been stained, sealed or treated with any kind of glues or oils (even if they are natural oils). if you mix your media (like I do with water marbling) make sure to wood burn first and then add other mediums.

  • craft store wood: many stores sell wood for crafting with but the majority of the time those wood slices are intended to be embellished with paint, chalk or other mediums and are not meant for pyrography!

  • wood with with "poison" in the name: burning poison ivy, poison sumac, poison oak, or pretty much anything else with the word "poison" in it’s name releases the irritant oil urushiol into the smoke. breathing it in can cause lung irritation and severe allergic respiratory problems, according to the Centres for Disease Control and Prevention.

  • the yew tree (Taxus baccata) and a related species common to gardeners, Japanese yew (Taxus cuspidata) is known to be one of the most poisonous woody plants in the world, with all components of the tree, excepting the fleshy red part of the berry containing lethal amounts of taxine, a toxic alkaloid found in the yew.

  • oleander shrubs: these thrive in frost-free climates and every part of it is toxic. Definitely don’t burn it in any way - don’t even use a branch to toast your marshmallow on.

  • mexican pepper: also known as Brazilian pepper wood, it is similar to poison ivy, poison oak and poison sumac, the leaves and bark contain urushiol, a toxic oil that causes serious rashes and allergic reactions.

in short. if you feel any dizziness or headaches coming on while burning, stop and assess your situation. do some research. reach out to me or ask another pyro professional!

always check what you are burning on before you burn. I like to use the wood-database.com for a quick look up and do a little more research if I don’t get enough Information from there.

When in doubt, choose a wood species from this list of best wood for pyrography to ensure you are safe and burning on wood that works great with pyrography.

happy and safe burning my friends!

want to learn more about pyrography??

take an in-person class or learn online!

grab the wood burning toolkit to learn online at your own pace with resources, instructional videos and more.


sources:

https://www.wood-database.com/wood-articles/wood-allergies-and-toxicity/

https://www.goodhousekeeping.com/home/a20705861/kinds-of-wood-not-to-burn/

https://wooddad.com/what-wood-is-toxic-to-burn/

https://homeguides.sfgate.com/burning-oleander-produce-poisonous-smoke-75289.html

https://www.epa.gov/burnwise/best-wood-burning-practices

https://www.cdc.gov/niosh/docs/2010-118/default.html

Learn to wood burn and draw radial symmetry patterns!

learning about radial and symmetry design principles can greatly improve an artist's ability to create visually striking and harmonious compositions. Radial designs are based on circular or spiral patterns that radiate out from a central point, while symmetry designs are based on mirroring patterns around a central axis. both principles can be used to create balanced and aesthetically pleasing compositions that draw the viewer's eye.

pyrography is a unique and fascinating medium that can produce stunning results when used correctly. by learning the techniques and best practices for pyrography, artists can add a new dimension to their creative repertoire and explore the possibilities of working with wood or other materials.

the tutorial will cover important technical aspects of drawing your own radial symmetry patterns as well as pyrography, such as selecting the right tools, working with different types of wood, and achieving different effects through varying the temperature and pressure of the pyrography tool. This technical knowledge can be essential for achieving the desired results in a pyrography piece and can save artists time and frustration in the long run.

join Rachel and I of wood burn corner and LEARN THESE CREATIVE AND RELAXING ART FORMS!

Learn to wood burn + make your own DIY radial symmetry designs and transfer them onto wood!


Or grab them separately!


WHAT TO EXPECT

  • Step-by-step instructions on how to wood burn and pyrography basics like safety, techniques and more (free template emailed when you register)

  • Step-by-step instructions on how to create your own radial symmetry patterns and transfer them onto wood!

  • A list of resources will be provided so you can get all the tools, materials and information you need to create unique works of art.

RESOURCES AND TOOLS

Join us with your pyrography tools, a wood slice and a design (included in your purchase or you can bring your own) if you plan on burning along with us for intro to wood burning. Make sure to print the template sized to your wood, along with graphite paper to transfer it onto the slice.

If you don’t have any pyrography tools or materials and want to burn with us, check out the DIY Wood Burning Kit blog post for resources and links on where to purchase everything you need to get wood burning.

All you need for drawing your own radial symmetry pattern is a piece of paper, pen/pencil, a compass (we can improvise), and a ruler (also optional)!


The Pyrography + Business Summit

thank you for Joining us in 2022 for this unique and immersive community experience! If you missed the event, click on the button below to get your copy of the recordings:


OVER 30 FREE CLASSES COVERING:

PYROGRAPHY

Introduction to Wood Burning

Safety + Transfer Techniques

Pyrography Books Discussion

Wood Burning Tools

Tools of the Trade

Wood + Other Surfaces

Adding Color

Finishes

8 Masterclasses on Pyrography Techniques

Burn-Alongs with Expert Pyrographers

Panel Discussion on Pyrography

Interviews

Live Community Chat + Wood Burn Challenges

BUSINESS

Goal Setting + Finding Focus

Business Books Discussion

Making Money as an Artist

Selling Online + In-person

Teaching Classes

Email Marketing

Websites + E-commerce

Pricing Your Art

Photography and Videography

Social Media + Pinterest

Live Coaching Sessions

Business Panel Discussion

Interviews


39 ONLINE CLASSES INCLUDING INTERVIEWS, MASTERCLASSES, COMMUNITY CHATS, CHALLENGES, GIVEAWAYS, BUSINESS CLASSES, AND MUCH MORE TAUGHT BY PROFESSIONALS!

Didn’t make it to the FREE live summit? Purchase access to recordings here.

Want to support this FREE event? Donate here.


WATCH EXPERTS IN THEIR FIELD WOOD BURN LIVE!

Attendees have a chance to ask questions, watch, and learn from some of their favourite professional artists:

Learn to burn REALISTIC EYES + FUR with MINISA ROBINSON of MINISA PYROGRAPHY & ARTS

Dive into TEXTURE techniques with Aney of PYROCRAFTERS

learn the art of wood burning PHOTO-REALISM with AMANDA HUML

burn-along with BEE LOCKE of BEE SYMMETRY

Learn all about MIXED MEDIA with ANDREINA WINFREE of REINAMOR

Jane of JANE VAN DER WOODSEN will be sharing the best SHADING TIPS + TRICKS

Add COLOR to your pyrography pieces with TACIE JENSEN of TACIE JENSEN ART

Join Rachel STRAUSS WOOD BURN CORNER for an INTRO TO WOOD BURNING


all this and then some: wood burning and business classes, community conversations, challenges, panel discussions, tool reviews, a bunch of giveaways and so much more!!


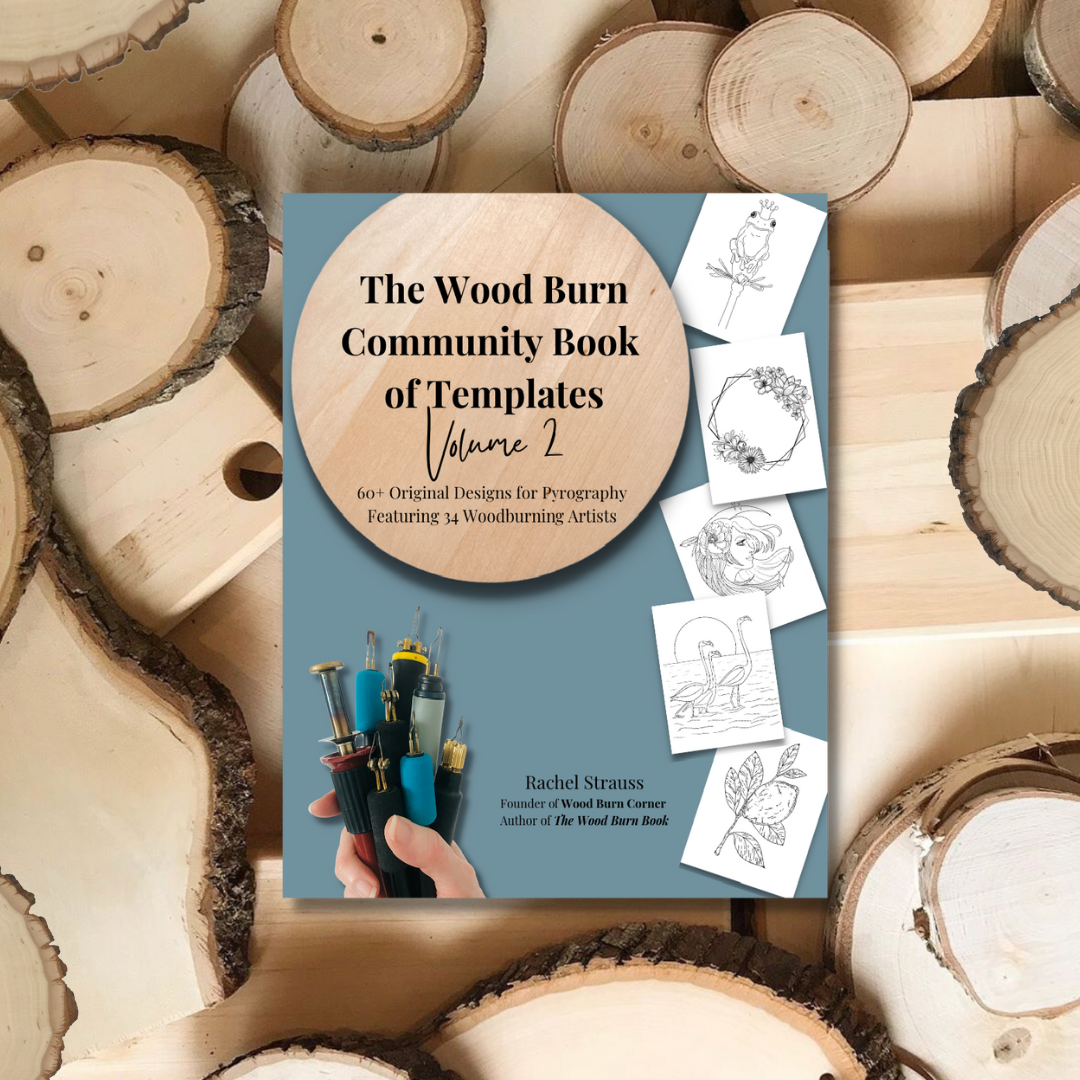
The Wood Burn Community Book of Templates Volume two

We are so excited to be making a second edition of The Wood Burn Community Book of Templates!

The first book brought together a whole bunch of artists in the community, as well as new pyrographers.

It was a huge success to those wanting to practice pyrography with templates they actually enjoy burning - without the pressure of designing something on their own.


pyrography-designs-for-tracing
 

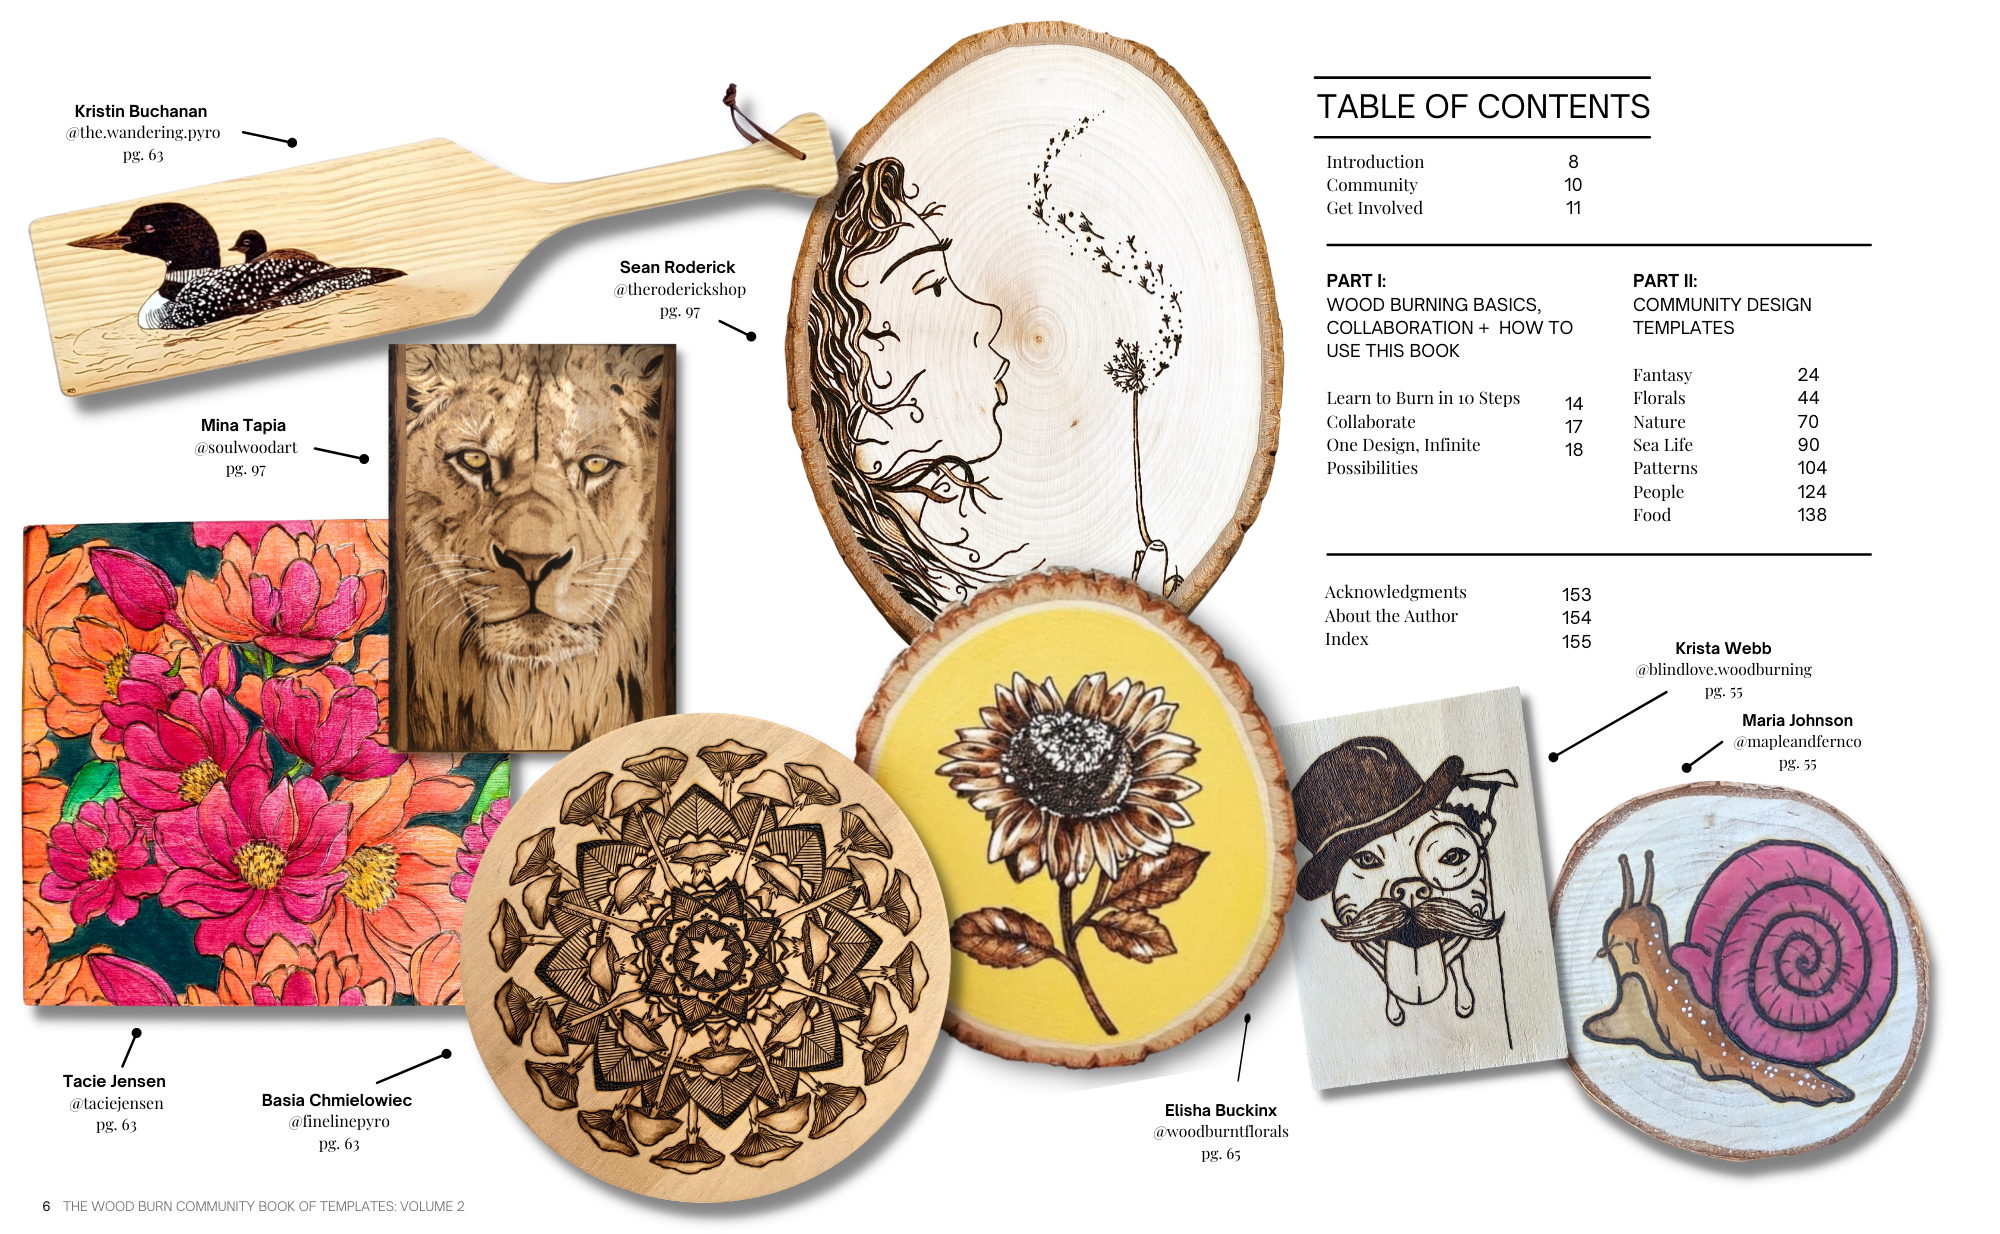
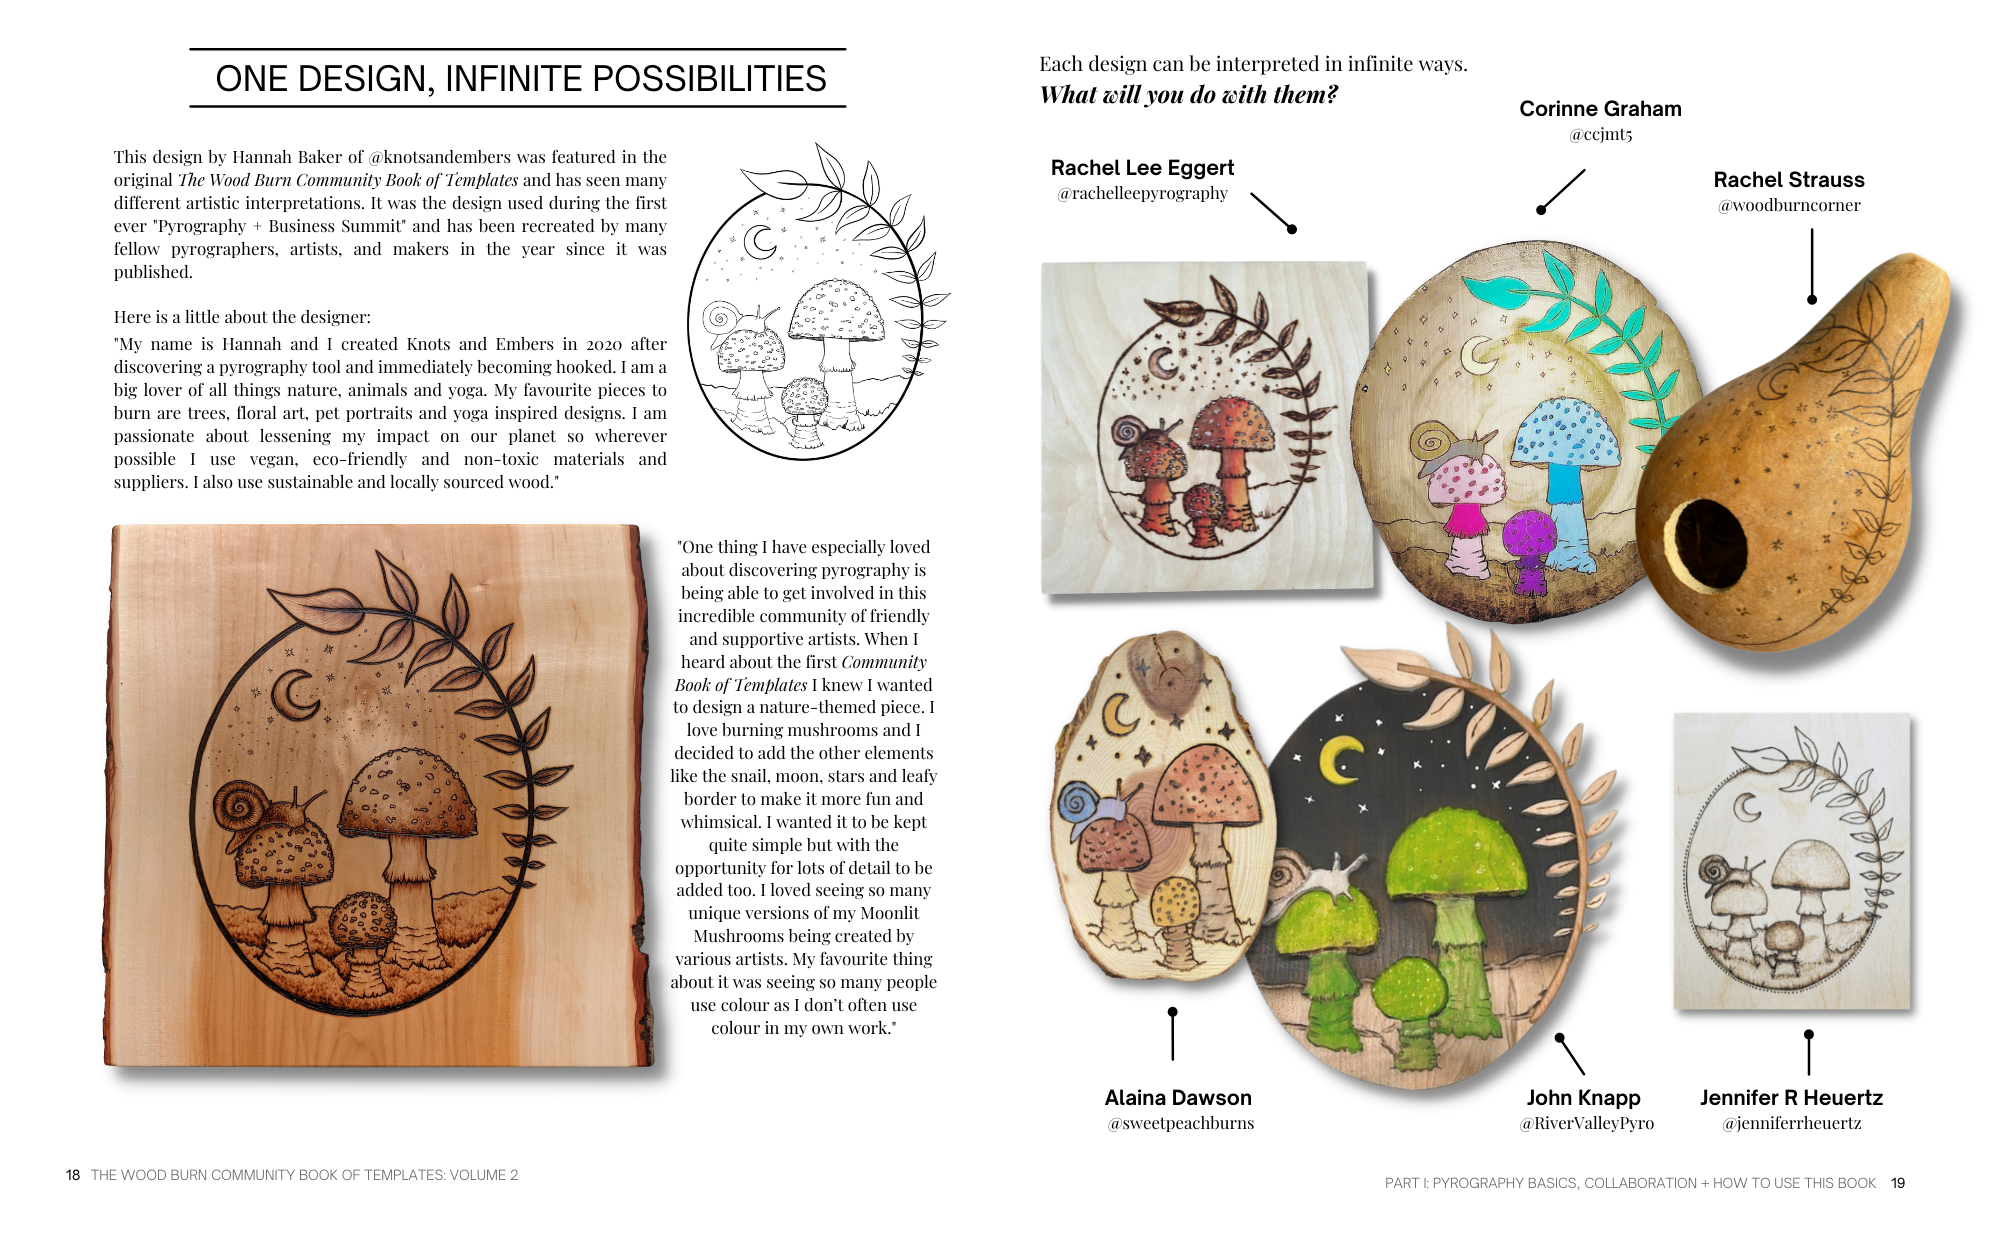
The Wood Burn Community Book of Templates features pyrography design patterns created by the community for the community. It showcases 60+ original templates from 34 wood burning artists from around the globe, with the intention of helping artists of all skill levels past, present, and future to hone their craft, try new styles, and make beautiful art through collaboration. This collection of designs include fantasy, florals, nature, sea life, patterns, people and more.

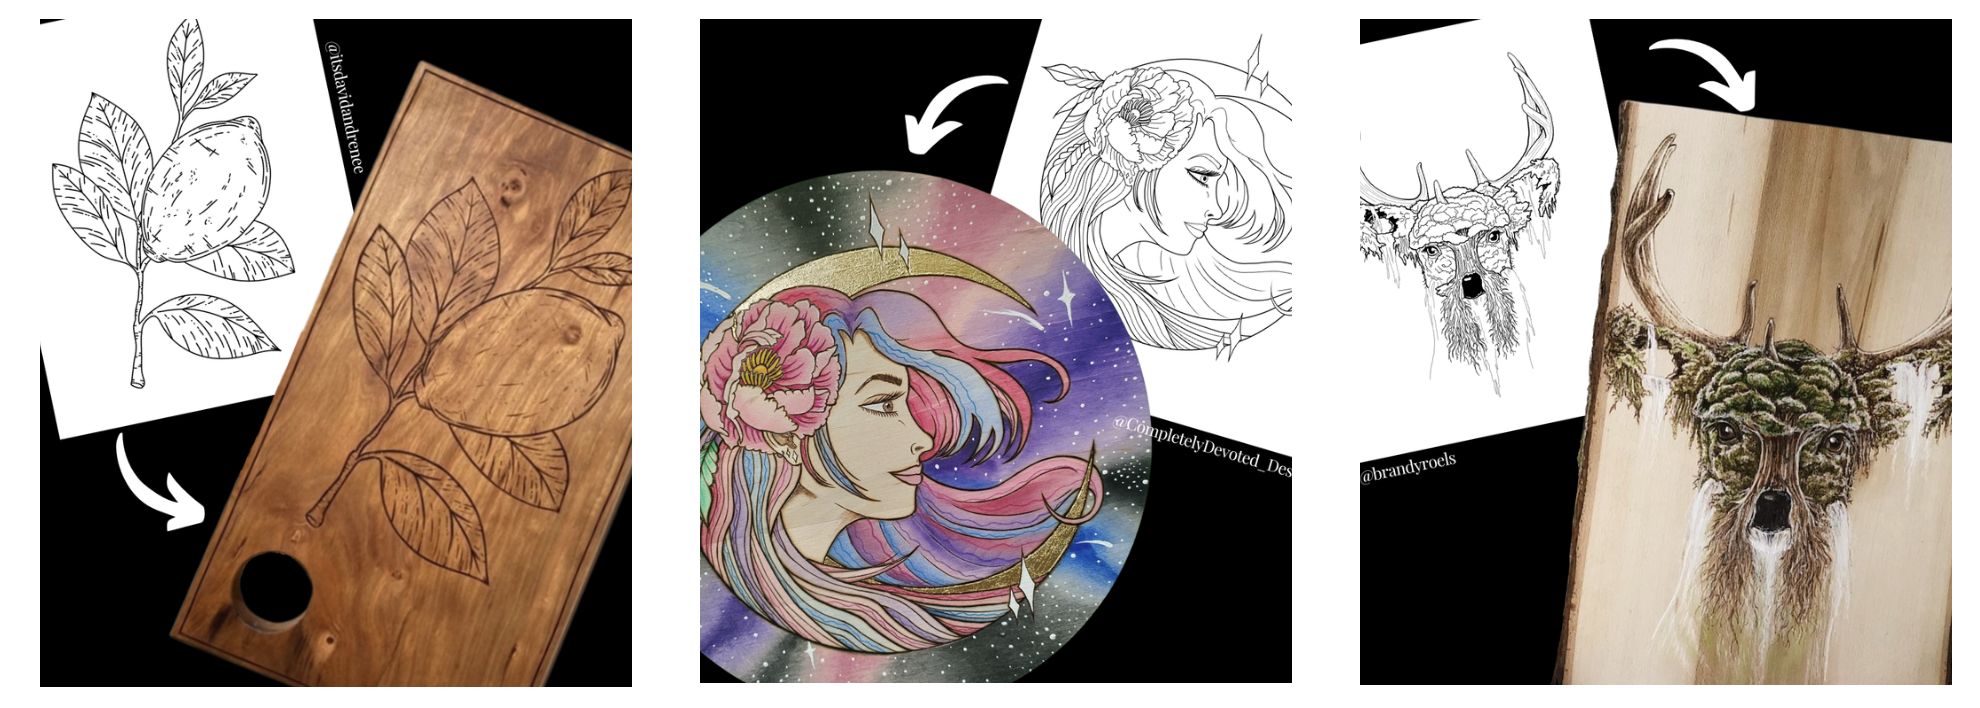
Check out #thewoodburncommunitybook on instagram to view completed projects!

 
patterns-to-trace

Easily size and print the designs to match the wood you already have by downloading the digital version


Every one-of-a-kind piece of art you create from these community templates is a collaboration! Each design can be interpreted in an infinite number of ways.

 
pyrography-patterns
 

Rachel Strauss, author of The Wood Burn Book and the original Wood Burn Community Book of Templates founder of Burn Club and Wood Burn Corner, includes a basic wood burning quickstart guide, and provides you with a list of essential materials needed for pyrography. She offers information on getting involved in the community, before presenting you with a feast of artwork, each begging to become your next creation!

 
how-to-wood-burn
 

with 60+ original templates

 
wood-burning-templates


check out this flip through:


more template books!

template books, pyro project inspiration books and more!


individual-templates-for-pyrography.png

shop individual templates

check out our collection of templates you can purchase individually on woodburncorner.com


wood turning projects


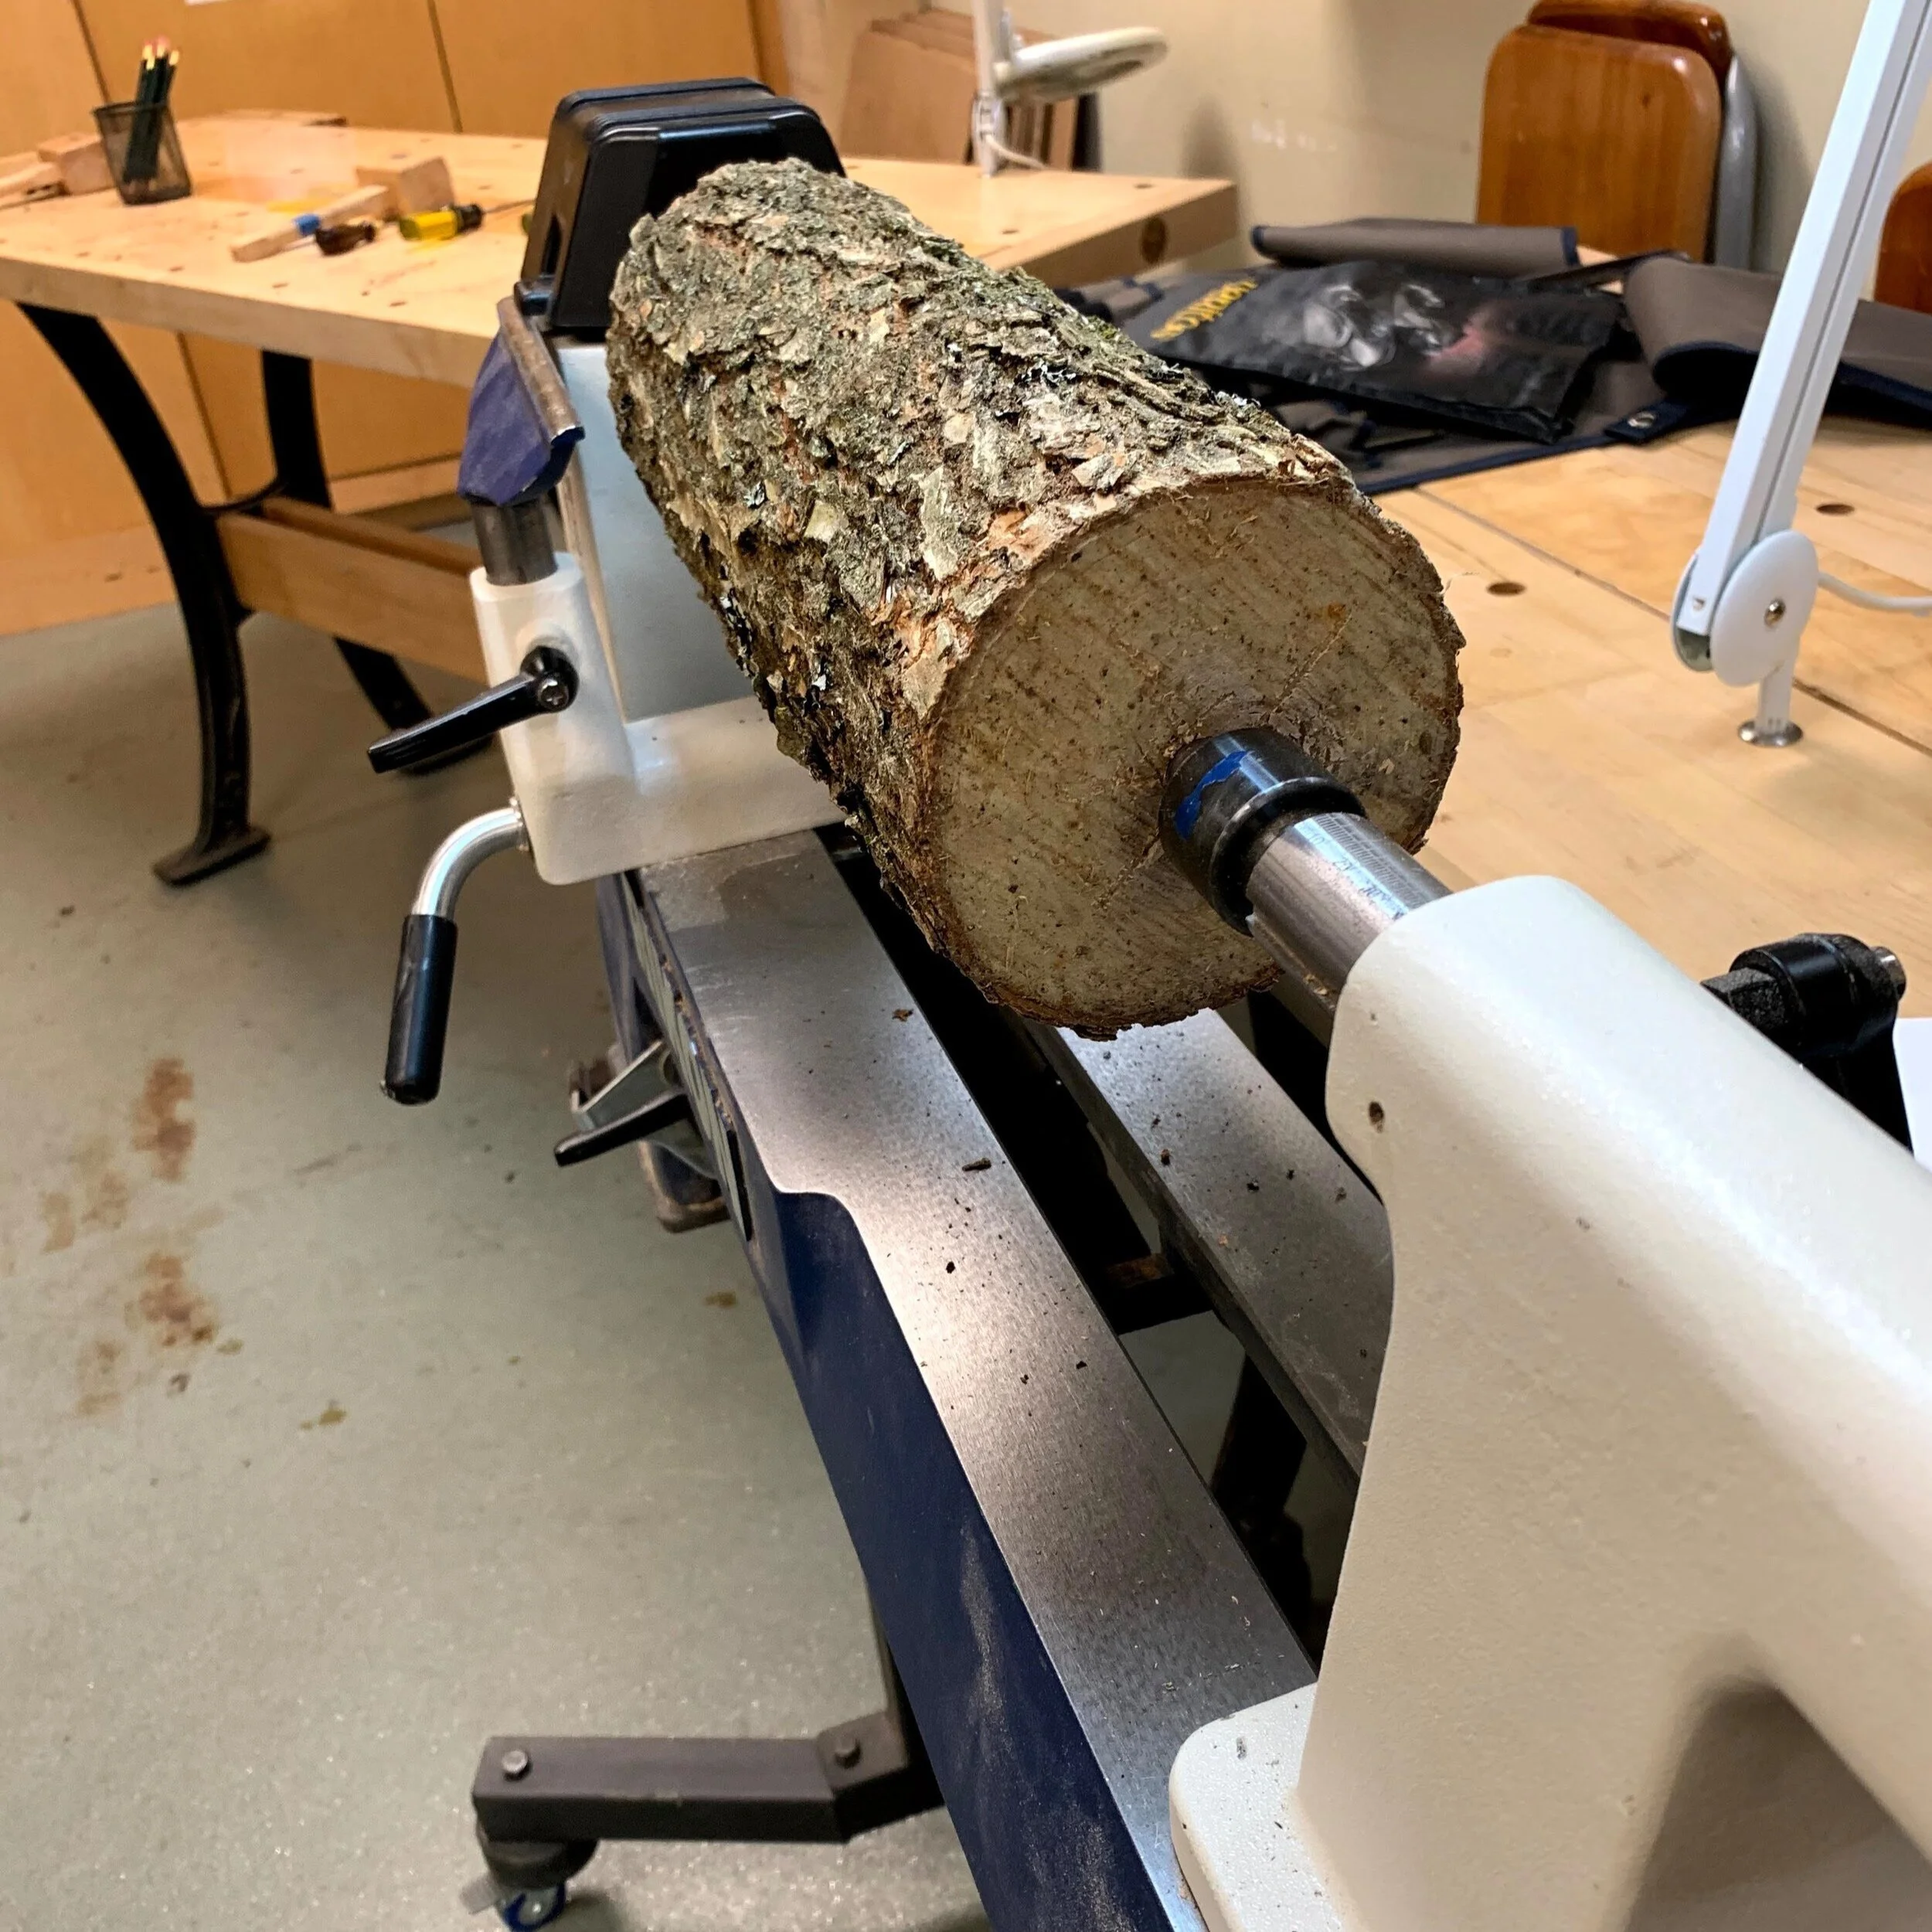
woodturning is a form of woodworking that involves shaping a piece of wood into a desired shape and form using a lathe.

the lathe is a machine that rotates the wood at high speed while the woodturner uses various cutting tools to shape and carve the wood.

the first step is selecting a suitable piece of wood and mounting it on the lathe. the wood is then rotated while the woodturner uses chisels, gouges, and other cutting tools to shape the wood.

you may also use sandpaper and other finishing tools to smooth the surface of the wood and achieve the desired finish.

woodturning can be used to create a wide range of objects, including bowls, vases, platters, and other decorative and functional items.

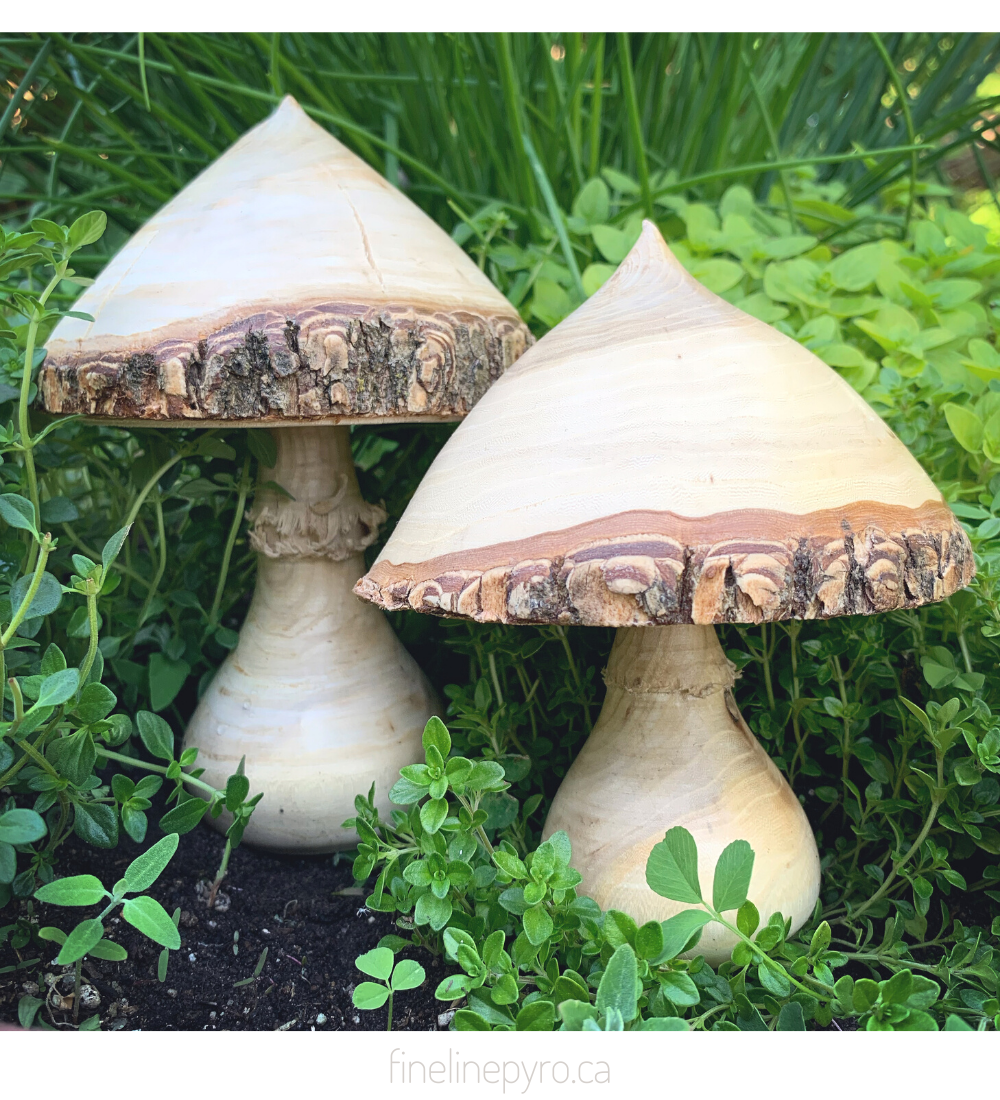
check out these adorable little mushrooms I made at lee valley tools!


Andy, from Lee Valley Tools below, is demonstrating the process of woodturning:

wood turning was really fun! it was also a bit dangerous and there were a lot of tips and tricks I learned from the teachers at lee valley which, not only made me enjoy the whole process, but also not loose any fingers!

make sure to check out the discovered section for some cool how-to project videos! hopefully classes will return to learn in person again, but for now, these guys have worked hard to create some pretty awesome wood working, gardening, and cooking project ideas and tutorials!